![]()
Last Updated on 26 April 2025
Is it possible to compose music without hiring a music specialist? The answer is yes, thanks to Artificial Intelligence. Many platforms offer this facility online, but what if we build our own?
In this tutorial, we will learn how to generate music using Python, TensorFlow, and deep learning techniques, and create our own AI music composer. We will use a MIDI dataset to train our neural network to make it able to create human-like music.
At the end of this tutorial, you will learn:
- How to process and understand MIDI data
- How to build and train an LSTM-based neural network
- How to generate new music using a trained model
- How to convert MIDI files to audio for playback
Are you a beginner or experienced? Don’t worry, the entire tutorial is divided into several parts, which will help you understand the concept easily.
So, let’s get started.
A Quick Recap
Before proceeding to the programming part, let’s recap some basic concepts related to music generation using deep learning and this project.
What is a Neural Network?
A neural network is a type of computer program that tries to work like the human brain. Just like our brain uses neurons to process information, a neural network uses small units (called “nodes” or “neurons”) to understand patterns in data.
Real-life example:
Imagine you’re learning to recognize different musical instruments just by hearing them. The more you listen and practice, the better you get. A neural network learns in a similar way, by analyzing lots of examples and adjusting itself to make better guesses.
What is an LSTM-based Neural Network?
LSTM stands for Long Short-Term Memory. It’s a special kind of neural network that is very good at learning sequences, like a sentence or a melody of notes.
Real-life example:
Think of you’re listening to a song. You don’t just remember the current note—you remember the notes that came before it too, which helps you predict what’s coming next. LSTM networks do the same thing.
They’re great for tasks like text generation, music generation, or time-series prediction, where remembering the past helps in future prediction.
What is MIDI Data?
MIDI stands for Musical Instrument Digital Interface. It’s a file format that stores instructions for music rather than actual sound. It tells the computer things like:
- Which note to play (pitch),
- How hard is it to play it (velocity),
- How long to hold the note (duration),
- And when to start playing it (timing or interval).
Real-life example:
Think of a MIDI file like a digital sheet of music. Instead of audio, it’s a set of commands telling a virtual piano (or any instrument) which keys to press and when.
How Will AI Music Generation Work?
This project teaches a computer to listen to music and create new music using a deep learning model.
Here’s how it works step-by-step:
- 🎵 Read MIDI Files: The program starts by reading MIDI files (digital music sheets) from our computer.
- 🔍 Convert to Notes: Each MIDI file is turned into a list of notes with information like pitch, velocity, duration, and timing.
- 🔢 Prepare for Learning: These notes are turned into sequences so the model can learn the pattern (like teaching a child to recognize the tune of “Twinkle Twinkle Little Star”).
- 🧠 Train the LSTM Model: An LSTM neural network is trained on these note sequences so it can understand how music flows.
- 🎼 Create New Music: After training, the model can take what it has learned and generate a brand new melody, just like a musician composing their own song!
Prerequisites
The training process of deep learning models (especially on large datasets like MAESTRO) is much faster on a GPU compared to a CPU, which is why a GPU-enabled system is required for this project.
Don’t worry if your machine doesn’t meet this requirement. We will use Google Colab for this project entirely, from the training process to running the code.
Google Colab offers some level of free high-power GPU acceleration, which is enough to deploy this Music Generator project. To learn more about Colab, visit this article: Google Colab for Python: Advantages vs Disadvantages.
Let’s Generate Music
Open Google Colab, sign in with your Gmail account, and open a new notebook.
Now go to the ‘Runtime‘ menu, select ‘Change runtime type‘, choose ‘T4 GPU‘ for the Hardware accelerator, and save it.
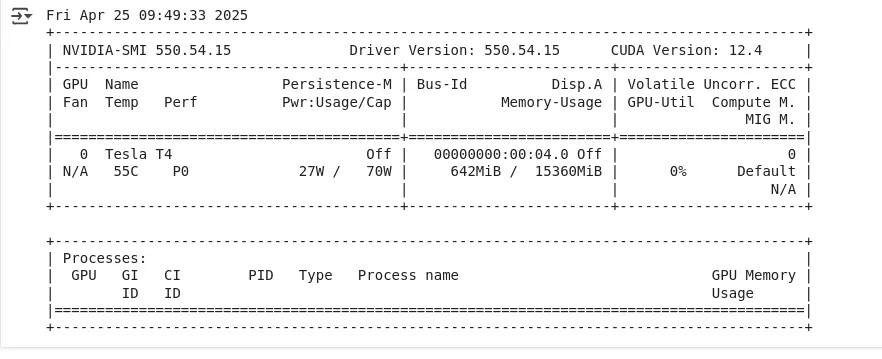
Let’s check whether the GPU is running perfectly or not using the following command:
!nvidia-smi
The output should look like the following:
Next, install the necessary Python libraries:
!pip install tensorflow pretty_midi music21 numpy matplotlib
Import the Modules
Let’s import all the necessary modules into our workspace.
import os
import pretty_midi
import numpy as np
import tensorflow as tf
from tensorflow.keras import layers, models
from pretty_midi import PrettyMIDI
from music21 import converter, instrument, note, chord, stream
import matplotlib.pyplot as plt
from collections import Counter
Check GPU Availability
Let’s check whether a GPU (Graphics Processing Unit) is available in our workspace for TensorFlow to use during model training.
print("GPU Available:", tf.config.list_physical_devices('GPU'))
Download the Dataset
In this project, we will use the MAESTRO dataset, which contains real piano MIDI files. You can also use other datasets. For example, the Lakh MIDI Dataset (LMD), which contains 176,581 MIDI files aligned with the Million Song Dataset.
Let’s download the MAESTRO dataset to our workspace. Next, unzip it and set the path of this file to the MIDI_DIR variable.
!wget -q http://storage.googleapis.com/magentadata/datasets/maestro/v3.0.0/maestro-v3.0.0-midi.zip
!unzip -q maestro-v3.0.0-midi.zip
!rm maestro-v3.0.0-midi.zip

# Set paths
MIDI_DIR = 'maestro-v3.0.0'
The MIDI files are stored in the maestro-v3.0.0 directory.
Other popular MIDI datasets
- Lakh MIDI Dataset (LMD)
- Description: Over 170,000 MIDI files aligned with the Million Song Dataset.
- Genres: Pop, rock, jazz, classical, electronic, and more.
- Why it’s good: Extremely diverse and widely used in music generation research.
- Link: https://colinraffel.com/projects/lmd/
- MetaMIDI (MetaDataset for MIDI)
- Description: A collection of cleaned and structured MIDI data labeled by instruments and genres.
- Genres: Classical, jazz, EDM, pop, etc.
- Why it’s good: Useful for multi-instrument music generation tasks.
- Link: https://zenodo.org/records/5142664#.YQN3c5NKgWo
- Note: Publicly accessible, but files are restricted to users with access.
- GiantMIDI-Piano
- Description: High-quality piano performances from famous classical composers.
- Why it’s good: Great for stylistic training, e.g., generating music in the style of Beethoven or Chopin.
- Link: https://github.com/bytedance/GiantMIDI-Piano
- Note: Piano-only, but much higher quality than Maestro.
- Groove MIDI Dataset (by Google Magenta)
- Description: Over 13 hours of expressive drum performances.
- Why it’s good: Perfect for generating realistic drum grooves and rhythms.
- Link: https://magenta.tensorflow.org/datasets/groove
- NES-MDB (Nintendo MIDI Music)
- Description: Music in the style of NES (8-bit video games).
- Why it’s good: Ideal if you’re exploring retro or chiptune-style music generation.
- Link: https://github.com/chrisdonahue/nesmdb
Convert MIDI to Notes and Vice-versa
Here, we will convert MIDI files into numerical note sequences and back.
def midi_to_notes(midi_file):
    """Convert a MIDI file to a sequence of notes"""
    pm = PrettyMIDI(midi_file)
    instrument = pm.instruments[0]
    notes = []

    # Sort the notes by start time
    sorted_notes = sorted(instrument.notes, key=lambda note: note.start)
    prev_start = sorted_notes[0].start

    for note in sorted_notes:
        # Calculate duration and interval between notes
        duration = note.end - note.start
        interval = note.start - prev_start
        notes.append([note.pitch, note.velocity, duration, interval])
        prev_start = note.start

    return np.array(notes)

def notes_to_midi(notes, output_file, instrument_name='Acoustic Grand Piano'):
    """Convert a sequence of notes to a MIDI file"""
    pm = PrettyMIDI()
    instrument = pretty_midi.Instrument(
        program=pretty_midi.instrument_name_to_program(instrument_name))

    prev_start = 0
    for n in notes:
        start = prev_start + n[3]  # Add interval to previous start time
        end = start + n[2]         # Add duration to start time
        note = pretty_midi.Note(
            velocity=int(n[1]),
            pitch=int(n[0]),
            start=start,
            end=end
        )
        instrument.notes.append(note)
        prev_start = start

    pm.instruments.append(instrument)
    pm.write(output_file)
    return output_file

def find_first_midi_file(directory):
    for root, _, files in os.walk(directory):
        for file in files:
            if file.endswith('.mid') or file.endswith('.midi'):
                return os.path.join(root, file)
    return None

# Get one MIDI file
sample_file = find_first_midi_file(MIDI_DIR)

if sample_file:
    notes = midi_to_notes(sample_file)
    print("Sample notes:", notes[:5])
else:
    print("No MIDI file found.")
Output

Code Summary
midi_to_notes(midi_file): It converts a MIDI file into an array of note sequences. Each note includes:- Pitch
- Velocity (intensity)
- Duration (how long the note is held)
- Interval (time between consecutive notes)
notes_to_midi(notes, output_file): It reconstructs a MIDI file from a note sequence array. It uses the intervals and durations to rebuild the timing of each note.find_first_midi_file(directory): It searches a given directory and returns the path of the first MIDI file found.
Load the Dataset
Here we will load and process multiple MIDI files from a directory to build a dataset of musical notes.
def load_dataset(midi_dir, num_files=50):
"""Load multiple MIDI files into a dataset from nested directories"""
all_notes = []
midi_files = []
# Walk through subdirectories to collect MIDI files
for root, _, files in os.walk(midi_dir):
for file in files:
if file.endswith('.midi') or file.endswith('.mid'):
midi_files.append(os.path.join(root, file))
# Limit to the specified number of files
midi_files = midi_files[:num_files]
for i, file_path in enumerate(midi_files):
try:
notes = midi_to_notes(file_path)
all_notes.append(notes)
print(f"Processed {i+1}/{len(midi_files)}: {file_path}")
except Exception as e:
print(f"Error processing {file_path}: {e}")
# Concatenate all notes if there’s any
if all_notes:
all_notes = np.concatenate(all_notes)
return all_notes
else:
print("No valid MIDI files were processed.")
return np.array([]) # Return empty array to prevent crash
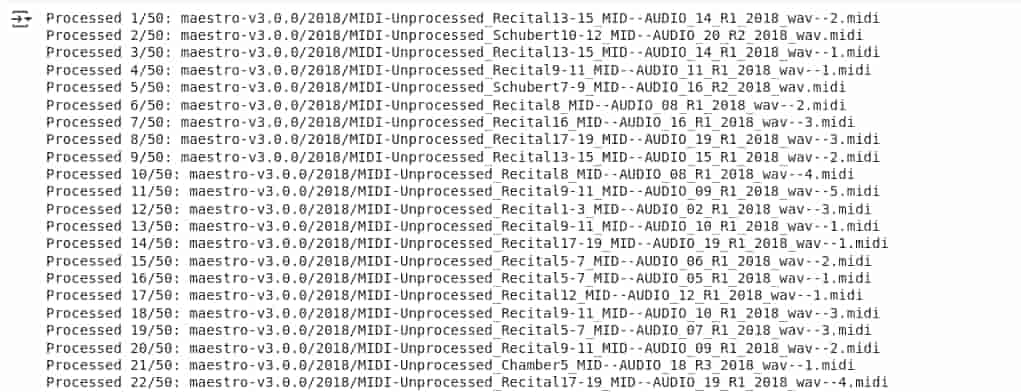
notes_dataset = load_dataset(MIDI_DIR, num_files=50)
if len(notes_dataset) > 0:
print("Total notes in dataset:", len(notes_dataset))
else:
print("Dataset is empty.")
Output
Code Summary
load_dataset(midi_dir, num_files=50):- This function searches through all subdirectories of the given folder.
- Finds and processes up to 50 MIDI files using the previously defined
midi_to_notes()function. - Each file’s note data is appended to a list and then combined into a single NumPy array.
- Error Handling: If any MIDI file fails to process, the error is caught and logged without stopping the program.
- Final Output:
- If notes were successfully extracted, it prints the total number of notes in the dataset.
- Otherwise, it indicates that the dataset is empty.
Normalize and Create Sequences
In this section, we will convert the musical notes dataset into input-output sequences to prepare it for training our deep learning model.
def prepare_sequences(notes, n_vocab, sequence_length=50):
    """Prepare input and output sequences for training"""
    # Normalize values
    pitch_min, pitch_max = 0, 128
    vel_min, vel_max = 0, 128
    dur_min, dur_max = notes[:, 2].min(), notes[:, 2].max()
    int_min, int_max = notes[:, 3].min(), notes[:, 3].max()

    normalized_notes = []
    for n in notes:
        normalized_notes.append([
            n[0] / pitch_max,          # Pitch
            n[1] / vel_max,             # Velocity
            (n[2] - dur_min) / (dur_max - dur_min),  # Duration
            (n[3] - int_min) / (int_max - int_min)   # Interval
        ])

    normalized_notes = np.array(normalized_notes)

    # Create input/output sequences
    network_input = []
    network_output = []

    for i in range(len(normalized_notes) - sequence_length):
        sequence_in = normalized_notes[i:i + sequence_length]
        sequence_out = normalized_notes[i + sequence_length]
        network_input.append(sequence_in)
        network_output.append(sequence_out)

    return np.array(network_input), np.array(network_output)

# Prepare sequences
sequence_length = 50
n_vocab = 128  # For pitch (0-127)
X, y = prepare_sequences(notes_dataset, n_vocab, sequence_length)
print("Input shape:", X.shape)
print("Output shape:", y.shape)
Output

Code Summary
prepare_sequences(notes, n_vocab, sequence_length=50):- It normalizes the note data (pitch, velocity, duration, interval) to scale values between 0 and 1.
- Generates sequences:
- Each input sequence contains a fixed number of notes (
sequence_length, default is 50). - The output is the note that comes immediately after the input sequence.
- Each input sequence contains a fixed number of notes (
- This structure helps train models to predict the next note in a sequence.
- Usage:
- The function is called with the note dataset and a vocabulary size (
n_vocab). - It prints the shape of the resulting input (
X) and output (y) arrays, useful for model training and debugging.
- The function is called with the note dataset and a vocabulary size (
Create The Deep Learning Model
Now we will create a deep learning model using LSTM (Long Short-Term Memory) layers, which are good at learning patterns in sequences, like a series of musical notes.
def create_model(input_shape, n_vocab):
"""Create the LSTM model"""
model = models.Sequential([
layers.LSTM(256, input_shape=input_shape, return_sequences=True),
layers.Dropout(0.3),
layers.LSTM(256),
layers.Dense(256, activation='relu'),
layers.Dropout(0.3),
layers.Dense(4) # Predicts pitch, velocity, duration, interval
])
model.compile(
loss='mse',
optimizer='adam',
metrics=['accuracy']
)
return model
# Create model
input_shape = (X.shape[1], X.shape[2])
model = create_model(input_shape, n_vocab)
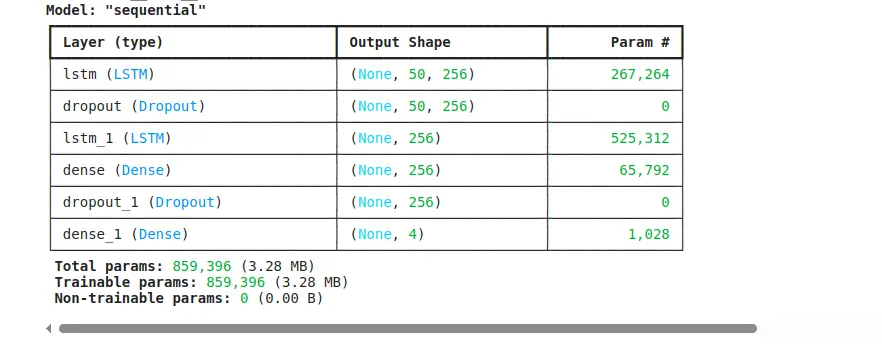
model.summary()
Output
Code Summary
create_model(input_shape, n_vocab):
- Builds a sequential model using:
- Two LSTM layers (each with 256 units) to understand patterns in note sequences.
- Dropout layers (0.3) to prevent overfitting during training.
- A Dense layer with 256 neurons and ReLU activation to process the output from the LSTMs.
- A final Dense layer with 4 units to predict the next note’s pitch, velocity, duration, and interval.
- The model uses mean squared error (MSE) as the loss function (suitable for predicting numerical values) and the Adam optimizer for training.
Usage:
- The model is created using the input shape of the dataset.
model.summary()prints the structure of the model, showing each layer and the number of parameters.
Train the Model
Here, we will train our AI model and monitor all the activities.
from tensorflow.keras.callbacks import ModelCheckpoint, EarlyStopping
checkpoint = ModelCheckpoint(
'best_model.h5',
monitor='loss',
verbose=1,
save_best_only=True,
mode='min'
)
early_stopping = EarlyStopping(
monitor='loss',
patience=10,
verbose=1,
restore_best_weights=True
)
# Train the model
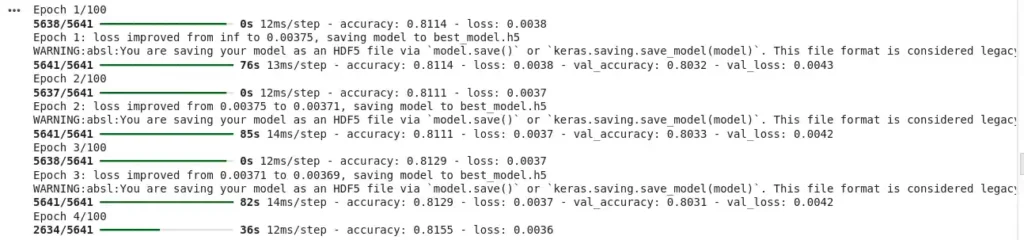
history = model.fit(
X, y,
epochs=100,
batch_size=64,
callbacks=[checkpoint, early_stopping],
validation_split=0.2
)
# Plot training history
plt.figure(figsize=(12, 6))
plt.plot(history.history['loss'], label='Training Loss')
plt.plot(history.history['val_loss'], label='Validation Loss')
plt.title('Training History')
plt.xlabel('Epoch')
plt.ylabel('Loss')
plt.legend()
plt.show()
Output

Code Summary
ModelCheckpoint: It automatically saves the best version of the model during training.
For example, if the model performs best after 50 rounds (epochs), that version is saved as “best_model.h5.”
EarlyStopping: It watches how well the model is learning. If there’s no improvement in the loss for 10 rounds, it stops training early to save time and prevent overfitting.
model.fit: This line actually trains the model using our prepared input and output data.
It trains for up to 100 rounds but may stop early (thanks to early stopping). A portion of the data (20%) is used to test the model’s performance while training (validation).
After training, it creates a graph showing how the model’s error (loss) changed over time, both during training and on the validation set. This helps you visually understand if the model is improving or overfitting.
Generate New Music
Let’s create brand new music notes using the trained AI model.
def generate_notes(model, initial_sequence, length=100):
    """Generate new notes using the trained model"""
    # Normalize the initial sequence (same as training)
    pitch_max = 128
    vel_max = 128
    dur_min = notes_dataset[:, 2].min()
    dur_max = notes_dataset[:, 2].max()
    int_min = notes_dataset[:, 3].min()
    int_max = notes_dataset[:, 3].max()

    generated_notes = []
    current_sequence = initial_sequence.copy()

    for _ in range(length):
        # Predict next note
        prediction = model.predict(np.array([current_sequence]), verbose=0)[0]

        # Denormalize the prediction
        pitch = int(prediction[0] * pitch_max)
        velocity = int(prediction[1] * vel_max)
        duration = (prediction[2] * (dur_max - dur_min)) + dur_min
        interval = (prediction[3] * (int_max - int_min)) + int_min

        generated_notes.append([pitch, velocity, duration, interval])

        # Update sequence
        new_note = [
            prediction[0],  # pitch (normalized)
            prediction[1],  # velocity (normalized)
            prediction[2],  # duration (normalized)
            prediction[3]   # interval (normalized)
        ]
        current_sequence = np.append(current_sequence[1:], [new_note], axis=0)

    return np.array(generated_notes)

# Generate new music
initial_sequence = X[np.random.randint(0, len(X)-1)]
generated_notes = generate_notes(model, initial_sequence, length=100)

# Save generated music
output_file = 'generated_music.mid'
notes_to_midi(generated_notes, output_file)
print(f"Generated music saved to {output_file}")
Code Summary
It randomly picks a short sequence of notes (from the training data) as the starting idea, kind of like giving the AI the first few keys of a melody.
generate_notes(model, initial_sequence, length=100):
- It asks the model to predict what note should come next, again and again, up to 100 times.
- After each prediction, it translates the output back into actual pitch, velocity, duration, and timing using the same scaling used during training (this is called denormalizing).
- Each new note is added to the sequence so the model can continue generating in a musical flow.
Once 100 notes are created, they are converted back into a MIDI file using the notes_to_midi() function.
This file (generated_music.mid) can be played just like any other song in a music app that supports MIDI.
Think of this like teaching someone the start of a melody and asking them to continue humming it based on what they’ve learned from hundreds of other songs. That’s exactly what the model does here—generate a melody that sounds musical based on what it has learned.
Play the Music
After generating a MIDI file, we will now hear the music directly inside Colab by converting the MIDI file into a playable audio format (WAV).
# Install dependencies (only once)
!apt-get install -y fluidsynth
!pip install midi2audio

# Convert MIDI to WAV using midi2audio
from midi2audio import FluidSynth
from IPython.display import Audio, display

def play_midi(midi_file, soundfont_path="/usr/share/sounds/sf2/FluidR3_GM.sf2"):
    """Convert MIDI to WAV and play in Colab"""
    fs = FluidSynth(sound_font=soundfont_path)
    fs.midi_to_audio(midi_file, "output.wav")
    return Audio("output.wav")

# Use it on your generated MIDI file
audio = play_midi(output_file)
display(audio)
Output
Code Summary
The above code converts the MIDI file into a WAV file using a sound font (a kind of digital instrument).
Think of MIDI like sheet music—it needs an instrument to sound like a real song. This code finds that instrument (via the sound font), plays the sheet music (MIDI), and gives you an actual sound file (WAV) to listen to.
Visit Also: Create a Weather Prediction AI Model using Python
Summary
In this article, we explored how to generate music using deep learning and Python. This project gives us a clear understanding of how Artificial Intelligence is used to compose music creatively.
We learned:
- What MIDI data is
- How to process MIDI data for training an AI model
- How to use LSTM networks for sequence generation
- How to generate new musical notes and save them as a MIDI file
- How to convert the generated notes into playable audio
The project is fully executable in Google Colab, and it makes it easy to train our model using a free GPU.
Try this AI music generator and see what kind of music it generates. Classical? EDM? Something totally new? Let me know in the comments!
For any queries related to this project, reach out to me at contact@pyseek.com. I will guide you.
Happy Coding!