![]()
Introduction
Have you ever wondered how traffic authorities count the number of vehicles on the road to manage traffic flow effectively? One common method is using advanced image processing and machine learning techniques.
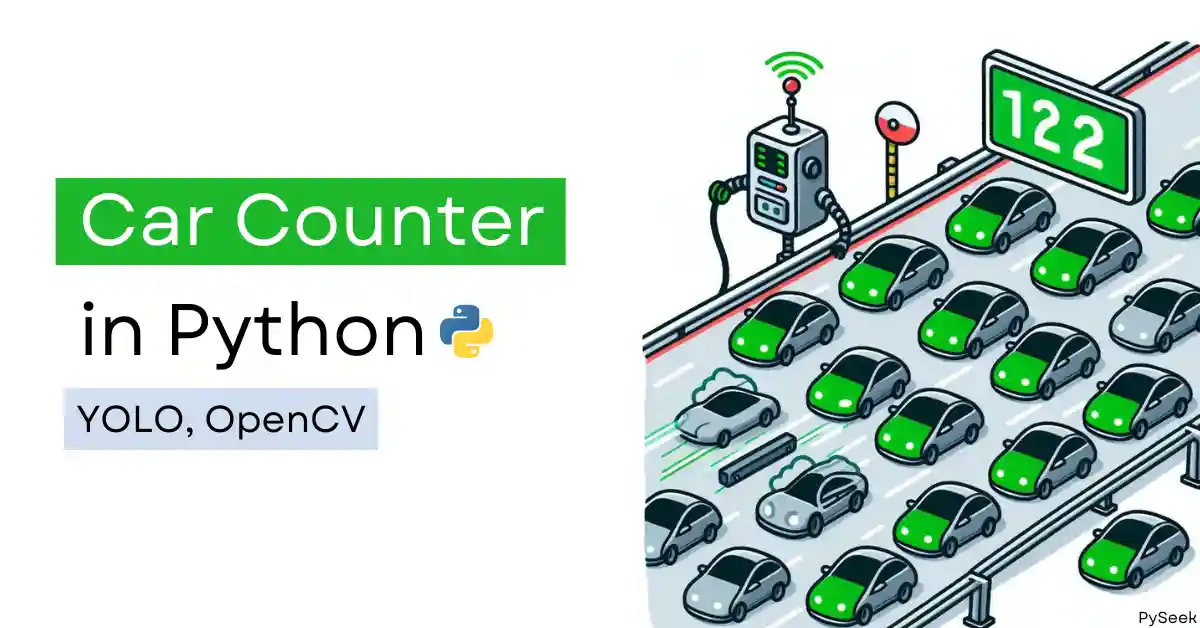
In this tutorial, we will create a car counter using YOLO (You Only Look Once) and OpenCV in Python. This Python project is a fantastic way for beginners to dive into computer vision and understand how machine-learning models can be used to solve real-world problems.
Importance of This Car Counter Project
Vehicle counting systems play a crucial role in modern traffic management. They help monitor traffic flow, reduce congestion, and enhance road safety. Traditional methods often involve manual counting, which is time-consuming and prone to errors. Automated systems, like the one we will build, provide a more efficient and accurate solution.
Understanding and implementing this project, you can contribute to developing smarter cities and optimizing traffic management systems.
Requirements and Installations
Before we start coding, let’s ensure Python (3.6 or later) is installed on your computer. You can check your Python version by typing python --version or python3 --version in your terminal. If you don’t have Python, you can download it for free from https://www.python.org/downloads/.
Now download all the dependencies we require using the following commands:
pip install gitpython>=3.1.30
pip install matplotlib>=3.3
pip install numpy>=1.23.5
pip install opencv-python>=4.1.1
pip install pillow>=10.3.0
pip install psutil
pip install PyYAML>=5.3.1
pip install requests>=2.32.0
pip install scipy>=1.4.1
pip install thop>=0.1.1
pip install torch>=1.8.0
pip install torchvision>=0.9.0
pip install tqdm>=4.64.0
pip install ultralytics>=8.2.34
pip install pandas>=1.1.4
pip install seaborn>=0.11.0
pip install setuptools>=65.5.1
pip install filterpy
pip install scikit-image
pip install lap
Alternative Installation
Installing the above utilities one by one might be a boring task. Instead, you can download the ‘requirements.txt‘ file containing all the dependencies above. Simply run the following command. It will automate the whole task in one go.
pip install -r requirements.txt
Setting Up the Environment
Organize Your Project Files
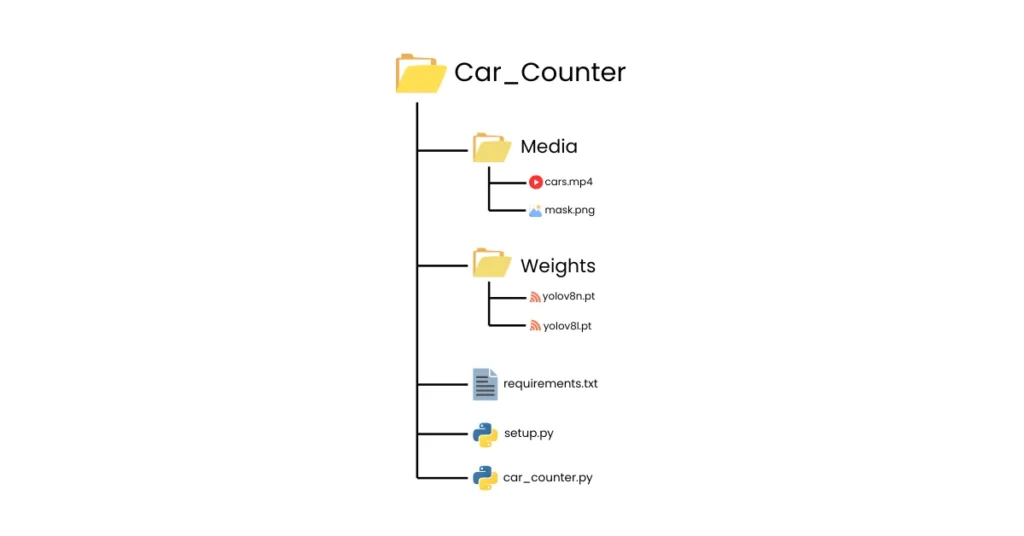
Create a separate folder for this Project named ‘Car_Counter‘. Under this folder create one more folder named ‘Weights‘ to store pre-trained YOLO models.
Download a YOLO Model
There are many pre-trained YOLO models available online. If your system isn’t configured with a graphics card, I would recommend using ‘yolov8n.pt‘ which is sufficient for this project. Alternatively, you can download the larger model ‘yolov8l.pt‘ for better accuracy. Download links are given below:
- yolov8n.pt: https://github.com/ultralytics/assets/releases/download/v8.1.0/yolov8n.pt
- yolov8l.pt: https://github.com/ultralytics/assets/releases/download/v8.1.0/yolov8l.pt
Media Files
In this project, I used a sample video of cars running on a highway and a mask image that will be used to define the area of interest in the video frame (where we want to count cars). It’s mandatory to have a video stream file and a mask image inside the project directory.
I would recommend you download the zip version of the ‘Media’ folder (containing ‘cars.mp4‘ and ‘mask.png‘ files which are used in the program), unzip it, and place it inside the main project directory (‘Car_Counter’).
Object Tracking Library
Once you’ve done the above steps, download a program file named ‘sort.py’ from the GitHub repository (https://github.com/abewley/sort/blob/master/sort.py) and save it inside the main project directory. It is used for object tracking. We’ll use it to avoid counting the same car multiple times.
Create Your Python Script
We’re almost at the end of setting up the environment. Now choose your favorite text editor and open the entire project folder ‘Car_Counter’. Inside this folder, create a Python program file named ‘car_counter.py‘. This is where you’ll write the code for your car counter program.
Your final project file hierarchy should look like the following:
The Source Code
Let’s break down the entire source code into multiple sections and explain what each part does:
Imports
In this section, we import all the libraries we’ll be using in our project.
import cv2
import math
import cvzone
import numpy as np
from sort import Sort
from ultralytics import YOLO
Video Capture and YOLO Model
# Initialize video capture
video_path = "Media/cars.mp4"
cap = cv2.VideoCapture(video_path)

# Load YOLO model with custom weights
yolo_model = YOLO("Weights/yolov8n.pt")
Here, we define the path to the video file we’ll be using (video_path). Then, we use OpenCV to capture the video (cap). We also load the YOLO model with the specified weights file path (yolo_model).
Class Names and Region Mask
# Define class names
class_labels = [
    "person", "bicycle", "car", "motorbike", "aeroplane", "bus", "train", "truck", "boat",
    "traffic light", "fire hydrant", "stop sign", "parking meter", "bench",
    "cat", "dog", "horse", "sheep", "cow", "elephant", "bear", "zebra", "giraffe",
    "backpack", "umbrella", "handbag", "tie", "suitcase", "frisbee", "skis", "snowboard", "sports ball", "kite",
    "baseball bat", "baseball glove", "skateboard", "surfboard", "tennis racket",
    "bottle", "wine glass", "cup", "fork", "knife", "spoon", "bowl",
    "banana", "apple", "sandwich", "orange", "broccoli", "carrot", "hot dog", "pizza", "donut", "cake",
    "chair", "sofa", "pottedplant", "bed", "diningtable", "toilet", "tvmonitor", "laptop", "mouse",
    "remote", "keyboard", "cell phone", "microwave", "oven", "toaster", "sink", "refrigerator", "book",
    "clock", "vase", "scissors", "teddy bear", "hair drier", "toothbrush"
]

# Load region mask
region_mask = cv2.imread("Media/mask.png")
In this section, we define the classes that our YOLO model can detect (class_labels). In our example, we include cars, people, and other objects. We also load an image mask (region_mask) that will be used to define the area of interest in the video frame (where we want to count cars).
Tracker and Counting Line
# Initialize tracker
tracker = Sort(max_age=20, min_hits=3, iou_threshold=0.3)

# Define line limits for counting
count_line = [199, 363, 1208, 377]
Here, we initialize a tracker object (tracker) from the Sort library. This tracker will help us keep track of the detected cars across different video frames. We also define a count_line which is a list of four numbers specifying the top-left and bottom-right corners of a line in the frame. Cars that cross this line will be counted.
The main loop
# List to store counted IDs
counted_ids = []

while cap.isOpened():
The while loop is the core of our program. It reads frames from the video and performs object detection operations.
Inside the main loop:
Frame Reading and Masking
    success, frame = cap.read()
    if not success:
        break

    masked_frame = cv2.bitwise_and(frame, region_mask)
Inside the main loop, we first read a frame from the video using cap.read(). It returns two values: a boolean value indicating success (success) and the actual frame (frame). If reading the frame fails, the loop breaks.
Next, we apply the region mask (region_mask) to the frame using bitwise AND operation (cv2.bitwise_and). This ensures we only process the area of interest defined by the mask.
Object Detection and Filtering
    # Perform object detection
    detection_results = yolo_model(masked_frame, stream=True)

    # Collect detections
    detection_array = np.empty((0, 5))

    for result in detection_results:
        for box in result.boxes:
            x1, y1, x2, y2 = map(int, box.xyxy[0])
            width, height = x2 - x1, y2 - y1
            confidence = math.ceil((box.conf[0] * 100)) / 100
            class_id = int(box.cls[0])
            class_name = class_labels[class_id]

            if class_name in ["car", "truck", "motorbike", "bus"] and confidence > 0.3:
                detection_entry = np.array([x1, y1, x2, y2, confidence])
                detection_array = np.vstack((detection_array, detection_entry))
The above code performs object detection using the YOLO model (yolo_model). We use the stream=True argument to process the video frame by frame. The results are stored in detection_results.
We then create an empty NumPy array (detection_array) to store the filtered detections. We iterate through each detection (box) in the results and extract information like bounding box coordinates, confidence score, and class ID.
Finally, we filter the detections only to include cars, trucks, motorbikes, and buses with a minimum confidence level of 30%. These filtered detections are then appended to the detection_array list.
Object Tracking and Counting
    tracked_objects = tracker.update(detection_array)

    # Draw count line
    cv2.line(frame, (count_line[0], count_line[1]), (count_line[2], count_line[3]), (0, 255, 0), 2)

    for obj in tracked_objects:
        x1, y1, x2, y2, obj_id = map(int, obj)
        width, height = x2 - x1, y2 - y1

        # Draw bounding boxes and labels
        cv2.rectangle(frame, (x1, y1), (x2, y2), (255, 255, 0), 2)
        cv2.putText(frame, f'ID: {obj_id}', (x1, y1 - 10), cv2.FONT_HERSHEY_SIMPLEX, 0.6, (255, 255, 0), 2)

        # Calculate center of the box
        center_x, center_y = x1 + width // 2, y1 + height // 2
        cv2.circle(frame, (center_x, center_y), 5, (0, 0, 255), -1)

        if count_line[0] < center_x < count_line[2] and count_line[1] - 20 < center_y < count_line[1] + 20:
            if obj_id not in counted_ids:
                counted_ids.append(obj_id)
                cv2.line(frame, (count_line[0], count_line[1]), (count_line[2], count_line[3]), (255, 0, 0), 2)
Here, we use the tracker.update function to associate detections from this frame with existing tracks or create new tracks for unseen objects. The updated tracks are stored in tracked_objects. We iterate through each tracked object (obj) and extract its bounding box information and ID. Bounding boxes and labels are drawn on the frame using OpenCV functions.
We then calculate the center of the bounding box. If the center falls within the defined count_line area (with some tolerance), we check if the object ID is already present in the counted_ids list. If not, it means a new car has crossed the line, and we add the ID to the list.
Displaying the Car Count and Finishing Up
    # Display count
    cvzone.putTextRect(frame, f'COUNT: {len(counted_ids)}', (20, 50), scale=1, thickness=2, colorT=(255, 255, 255), colorR=(255, 255, 0), font=cv2.FONT_HERSHEY_SIMPLEX)

    cv2.imshow("Car Counter", frame)

    if cv2.waitKey(1) & 0xFF == ord('q'):
        break

cap.release()
cv2.destroyAllWindows()
In this section, we finalize the processing for each frame. The total count of unique car IDs (len(counted_ids)) is displayed on the frame using the putTextRect() function.
The frame is then displayed with the title “Car Counter” using cv2.imshow. If the user presses the ‘q’ key, the loop breaks, and the program terminates. Finally, the video capture object (cap) is released, and all OpenCV windows are closed using cv2.destroyAllWindows().
The Output
Summary
In this tutorial, we built a car counter using Python, OpenCV, and YOLO. We learned how to perform object detection, object tracking, and count objects within a specific area in a video. Instead of a video, you can also set up a live camera recording to track the number of vehicles passing by a road.
We covered everything from setting up the environment and understanding the source code to visualize the final output. This project is a great example of how machine learning models can be applied to solve practical problems in traffic management using computer vision.
For any problem or queries related to this project, please feel free to let me know in the comments or you can mail me at contact@pyseek.com. I would like to help you.
If interested, explore more related Python projects here:
Happy coding!