![]()
Introduction
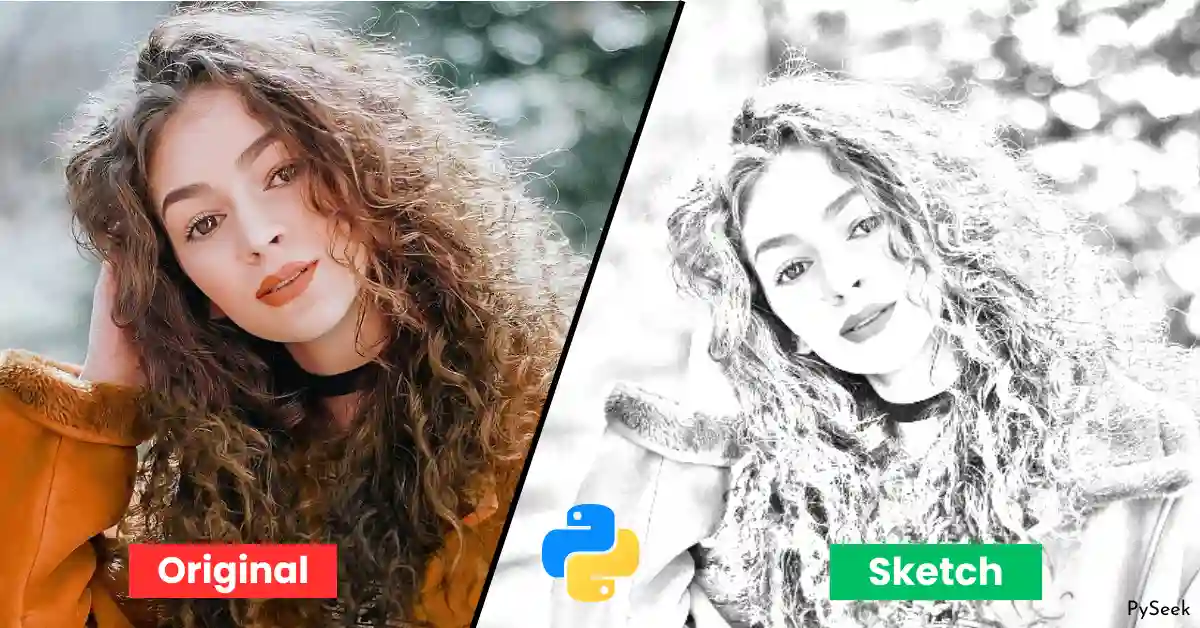
Have you ever tried sketching someone with a pencil and paper? If you have, then you know how much practice it takes to get a really good result. An Artist who can draw anything with just pencils often gets a lot of praise for their work.
But things have changed a bit now. Nowadays, many online tools and mobile apps can do the same thing with an image, and you might already know about them. In this tutorial, we will create such an Image to Pencil Sketch Converter using Python language with the help of OpenCV and Tkinter libraries.
Before moving to the Project discussion, we need to understand the logic behind this Image manipulation concept. So, I divided the whole topic into two parts. In the first part, you’ll learn how to convert an image to a pencil sketch step-by-step through a Python program.
In the second part, we’ll apply the same logic to create a Python application that will help to achieve the Sketch effect in just a few clicks. It would be so easy to use that application by anyone.
So, let’s not waste any more time and turn this idea into reality!
Requirements
First, we need to install the OpenCV library (Documentation). To get it, please use the following command:
pip install opencv-python
pip install opencv-python
pip install opencv-python
Don’t worry about Tkinter Library (Documentation). It comes pre-installed with most Python installations. In case if you don’t have it, you can install it using the following command:
pip install tk
pip install tk
pip install tk
Understanding the Program
Let’s break down the concept of image to a pencil sketch conversion using a Python program, step by step:
Importing the module
I recommended you create a separate folder named “Sketch-Maker” for this project and declare a Python file within it as “sketch_maker.py“.
Now, let’s start by importing the cv2 module.
import cv2
import cv2
import cv2
Opening an Image
Let’s open your gallery and pick a good-quality photo of yourself. Now keep it in the project folder.
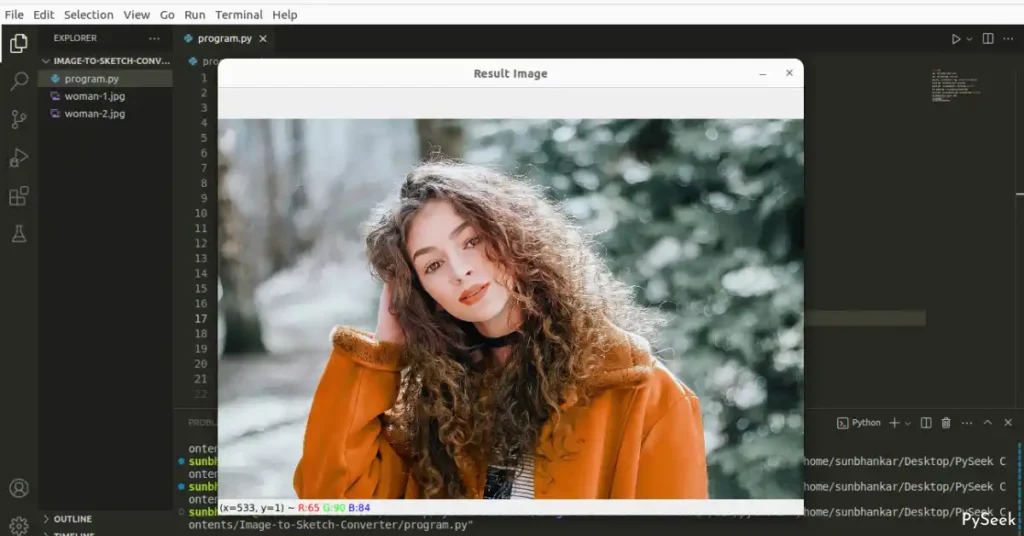
Mention the name of the image in a variable called ‘img_path‘ and load the image using cv2.imread function (Get the image used in the program from here: ‘woman.jpg‘).
img = cv2.imread("woman.jpg")
img = cv2.imread("woman.jpg")
img = cv2.imread("woman.jpg")Resizing and Displaying the Image
Not all computer or laptop users have the same screen sizes, which means the displayed image may not appear perfectly for everyone.
To make sure the image looks consistent for everyone, it’s important to adjust its size uniformly. You can achieve this by utilizing the cv2.imread function.
img = cv2.resize(img, (740,480))
img = cv2.resize(img, (740,480))
img = cv2.resize(img, (740,480))
Before we move to the editing phase, let’s display the original image using the cv2.imshow function.
cv2.imshow("Result Image", img)
# Press any key to exit
cv2.waitKey()
cv2.destroyAllWindows()
cv2.imshow("Result Image", img)
# Press any key to exit
cv2.waitKey()
cv2.destroyAllWindows()
cv2.imshow("Result Image", img)
# Press any key to exit
cv2.waitKey()
cv2.destroyAllWindows()Output
Converting to Grayscale
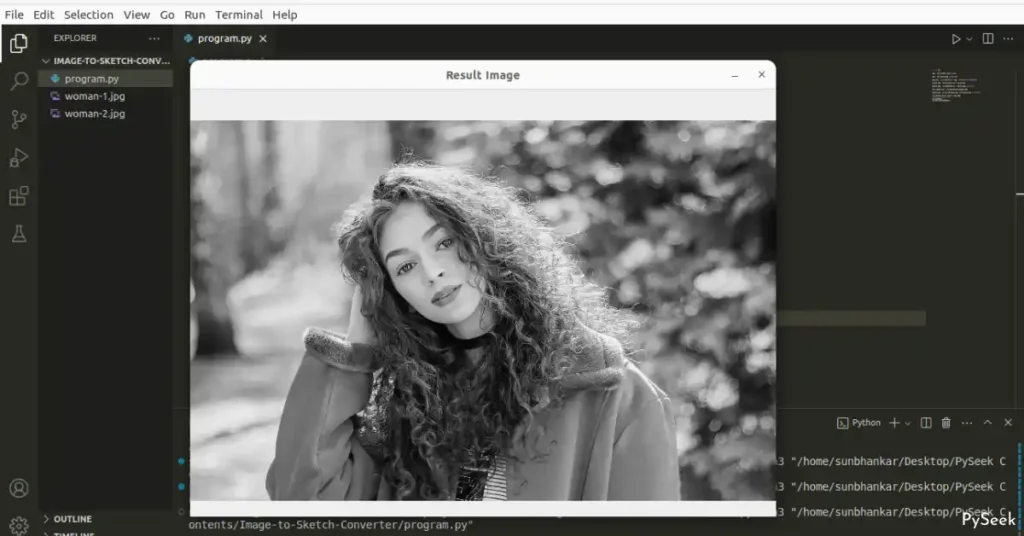
We’ll first convert the image to grayscale. To do so, we will use the cv2.cvtColor function. Within this function, we need to specify the initial loaded image as the first parameter, followed by the ‘code‘ value, which expects an integer input.
gray_img = cv2.cvtColor(src=img, code=cv2.COLOR_BGR2GRAY)
gray_img = cv2.cvtColor(src=img, code=cv2.COLOR_BGR2GRAY)
gray_img = cv2.cvtColor(src=img, code=cv2.COLOR_BGR2GRAY)
Remembering the numbers for different ‘code’ options is hard. That’s why we prefer using easier-to-recall code names like cv2.COLOR_BGR2GRAY instead of dealing with the numbers.
Here is the documentation for the conversion of color spaces: OpenCV Documentation.
Now, to display the transformed grayscale image, we’ll use the same code block utilized for display in the previous section. We just need to update the second parameter in the cv2.imshow function to “gray_img“.
cv2.imshow("Result Image", gray_img)
# Press any key to exit
cv2.waitKey()
cv2.destroyAllWindows()
cv2.imshow("Result Image", gray_img)
# Press any key to exit
cv2.waitKey()
cv2.destroyAllWindows()
cv2.imshow("Result Image", gray_img)
# Press any key to exit
cv2.waitKey()
cv2.destroyAllWindows()Output
Inverting the Gray Image
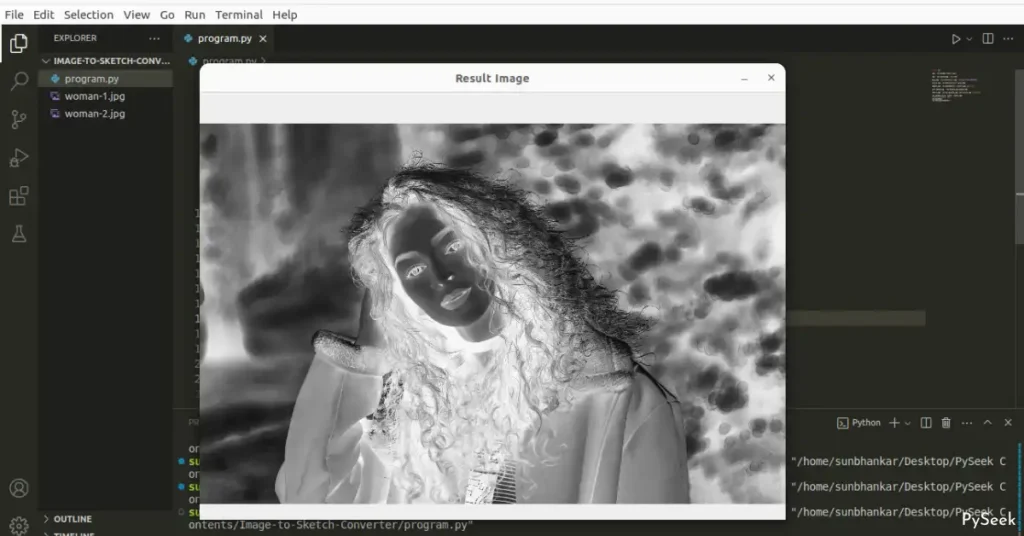
In this section, we’ll take the grayscale image (“gray_img“), and invert its pixel values. This means that black pixels become white and white pixels become black, effectively creating a negative image of the original grayscale image.
invert_img = cv2.bitwise_not(src=gray_img)
invert_img = cv2.bitwise_not(src=gray_img)
invert_img = cv2.bitwise_not(src=gray_img)
Let’s display the interverted gray-scaled image.
cv2.imshow("Result Image", invert_img)
# Press any key to exit
cv2.waitKey()
cv2.destroyAllWindows()
cv2.imshow("Result Image", invert_img)
# Press any key to exit
cv2.waitKey()
cv2.destroyAllWindows()
cv2.imshow("Result Image", invert_img)
# Press any key to exit
cv2.waitKey()
cv2.destroyAllWindows()Output
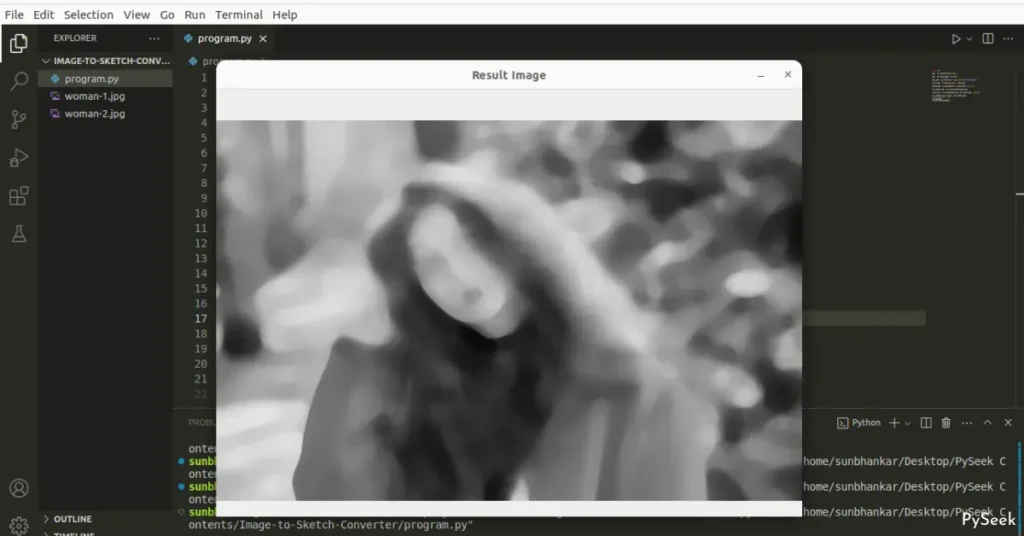
Smoothing the Image
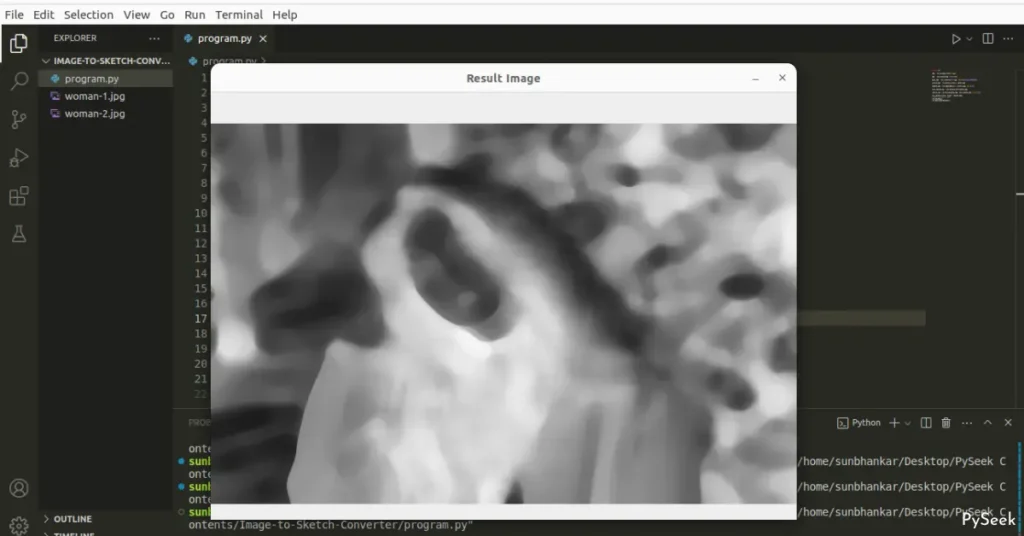
Smoothing an image is an important step in the process of an image to a pencil sketch conversion. It is the art of blurring an image while preserving its essential features like edges and textures. It also helps to reduce noise and simplify image details.
In this step, we will apply median blur to our inverted image to achieve our present goal.
smooth_img = cv2.medianBlur(src=invert_img, ksize=37)
smooth_img = cv2.medianBlur(src=invert_img, ksize=37)
smooth_img = cv2.medianBlur(src=invert_img, ksize=37)
In the code above, ‘ksize‘ specifies the size of the kernel or window used for the median filtering operation. It determines the neighborhood over which the median value is computed for each pixel.
For example, “ksize=37” means that a square kernel of size 37×37 pixels will be used for the median filtering operation. The median value within this 37×37 neighborhood will be computed for each pixel in the “invert_img”, resulting in the smoothed image stored in “smooth_img”.
We’ll display the smoothed image using the same technique as the previous section.
cv2.imshow("Result Image", smooth_img)
# Press any key to exit
cv2.waitKey()
cv2.destroyAllWindows()
cv2.imshow("Result Image", smooth_img)
# Press any key to exit
cv2.waitKey()
cv2.destroyAllWindows()
cv2.imshow("Result Image", smooth_img)
# Press any key to exit
cv2.waitKey()
cv2.destroyAllWindows()Output
Inverting the Smoothed Image
Again, we will invert the previously smoothed image (“smooth_img“) using the bitwise NOT operation.
invt_smooth_img = cv2.bitwise_not(smooth_img)
invt_smooth_img = cv2.bitwise_not(smooth_img)
invt_smooth_img = cv2.bitwise_not(smooth_img)
Let’s display the inverted image:
cv2.imshow("Result Image", invt_smooth_img)
# Press any key to exit
cv2.waitKey()
cv2.destroyAllWindows()
cv2.imshow("Result Image", invt_smooth_img)
# Press any key to exit
cv2.waitKey()
cv2.destroyAllWindows()
cv2.imshow("Result Image", invt_smooth_img)
# Press any key to exit
cv2.waitKey()
cv2.destroyAllWindows()Output
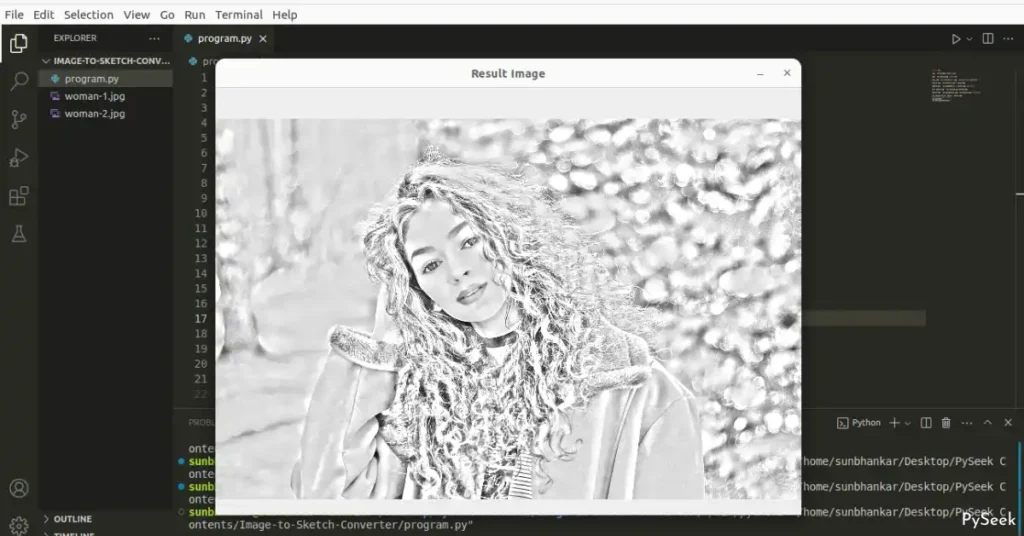
Applying Stylization
We are at the last step of our image-to-pencil sketch conversion using Python. In this section, we will perform pixel-wise division between the grayscale image (“gray_img“) and the smoothed image (“invt_smooth_img“) using the cv2.devide function.
sketch_img = cv2.divide(gray_img, invt_smooth_img, scale=220)
sketch_img = cv2.divide(gray_img, invt_smooth_img, scale=220)
sketch_img = cv2.divide(gray_img, invt_smooth_img, scale=220)
In the code above, ‘scale‘ specifies the scaling factor applied during the division operation. For example, if “scale=220“, each pixel in the resulting image will be calculated by dividing the corresponding pixels from the numerator and denominator images and then multiplying the result by 1/220.
This scaling factor can help adjust the brightness or contrast of the resulting image after the division operation.
Our sketch image is ready now, let’s display it.
cv2.imshow("Result Image", sketch_img)
# Press any key to exit
cv2.waitKey()
cv2.destroyAllWindows()
cv2.imshow("Result Image", sketch_img)
# Press any key to exit
cv2.waitKey()
cv2.destroyAllWindows()
cv2.imshow("Result Image", sketch_img)
# Press any key to exit
cv2.waitKey()
cv2.destroyAllWindows()Output
Save the Image
Add this code snippet at the end of the program to save the sketched image in the current working directory.
cv2.imwrite("result.jpg", sketch_img)
cv2.imwrite("result.jpg", sketch_img)
cv2.imwrite("result.jpg", sketch_img)Make the Program an Application
Let’s improve the user experience of the above program by giving a touch of Graphical Interface using the Tkinter library. We will use Python to create an application for converting an image into a pencil sketch.
The core logic of the program will be the same. In this case, the user interface will ease the app’s use. You can
- Select your favorite image.
- Display the original image.
- Select the intensity of the sketching quality.
- Save the resulting image.
So, Before you copy the entire code, create a Python file as ‘app.py‘ within the “Cartoon-Maker” folder.
import cv2
import pathlib
import pyautogui
from tkinter import *
from PIL import ImageTk, Image
from tkinter import filedialog

class SketchImage:
    def __init__(self, root):
        self.window = root
        self.window.geometry("940x580")
        self.window.title('Sketch Creator')
        self.window.resizable(width = False, height = False)

        self.width = 700
        self.height = 440

        self.Image_Path = ''
        self.SketchImg = ''

        # ==============================================
        # ================Menubar Section===============
        # ==============================================
        # Creating Menubar
        self.menubar = Menu(self.window)

        # Adding Edit Menu and its sub menus
        edit = Menu(self.menubar, tearoff=0)
        self.menubar.add_cascade(label='Open', menu=edit)
        edit.add_command(label='Open Image',command=self.Open_Image)


        sketch = Menu(self.menubar, tearoff=0)
        self.menubar.add_cascade(label='Sketch', menu=sketch)
        sketch.add_command(label='Create Sketch', command=self.CreateSketch)

        save = Menu(self.menubar, tearoff=0)
        self.menubar.add_cascade(label='Save', menu=save)
        save.add_command(label='Save Image', command=self.Save_Image)

        # Exit the Application
        exit = Menu(self.menubar, tearoff=0)
        self.menubar.add_cascade(label='Exit', menu=exit)
        exit.add_command(label='Exit', command=self.Exit)

        # Configuring the menubar
        self.window.config(menu=self.menubar)
        # ===================End=======================

        # Creating a Frame
        self.frame = Frame(self.window,
        width=self.width,height=self.height)
        self.frame.pack()
        self.frame.place(anchor='center', relx=0.5, rely=0.5)

        # The Scale widget to select the intensity of the
        # sketch quality
        self.intensity = Scale(self.window, from_=5, to=155, resolution=2, orient=HORIZONTAL, length= 300)
        self.intensity.set(37)
        self.intensity.place(x=320, y=520)

    # Open an Image through filedialog
    def Open_Image(self):
        self.Clear_Screen()
        self.Image_Path = filedialog.askopenfilename(title = "Select an Image", filetypes = (("Image files", "*.jpg *.jpeg *.png"),))
        if len(self.Image_Path) != 0:
            self.Show_Image(self.Image_Path)

    # Display the Image
    def Show_Image(self, Img):
        # opening the image
        image = Image.open(Img)
        # resize the image, so that it fits to the screen
        resized_image = image.resize((self.width, self.height))

        # Create an object of tkinter ImageTk
        self.img = ImageTk.PhotoImage(resized_image)

        # A Label Widget for displaying the Image
        label = Label(self.frame, image=self.img)
        label.pack()

    def CreateSketch(self):
        # storing the image path to a variable
        self.ImgPath = self.Image_Path

        # If any image is not selected
        if len(self.ImgPath) == 0:
            pass
        else:
            Img = cv2.imread(self.ImgPath)

            Img = cv2.resize(Img, (740,480))

            GrayImg = cv2.cvtColor(src=Img, code=cv2.COLOR_BGR2GRAY)

            InvertImg = cv2.bitwise_not(GrayImg)

            SmoothImg = cv2.medianBlur(src=InvertImg, ksize=self.intensity.get())

            IvtSmoothImg = cv2.bitwise_not(SmoothImg)

            self.SketchImg = cv2.divide(GrayImg, IvtSmoothImg, scale=250)

            cv2.imshow("Result Image", self.SketchImg)
            # Press any key to exit
            cv2.waitKey()
            cv2.destroyAllWindows()

    def Save_Image(self):
        if len(self.SketchImg) == 0:
            pass
        else:
            # Get the file name to be saved after making the sketch
            filename = pyautogui.prompt("Enter the filename to be saved")
            # Filename with the extension(extension of the original image)
            filename = filename + pathlib.Path(self.ImgPath).suffix
            # Saving the resulting file(self.SketchImg)
            cv2.imwrite(filename, self.SketchImg)

    # Remove all widgets from the frame
    def Clear_Screen(self):
        for widget in self.frame.winfo_children():
            widget.destroy()

    def Exit(self):
        self.window.destroy()


if __name__ == "__main__":
    root = Tk()
    obj = SketchImage(root)
    root.mainloop()
import cv2
import pathlib
import pyautogui
from tkinter import *
from PIL import ImageTk, Image
from tkinter import filedialog
class SketchImage:
def __init__(self, root):
self.window = root
self.window.geometry("940x580")
self.window.title('Sketch Creator')
self.window.resizable(width = False, height = False)
self.width = 700
self.height = 440
self.Image_Path = ''
self.SketchImg = ''
# ==============================================
# ================Menubar Section===============
# ==============================================
# Creating Menubar
self.menubar = Menu(self.window)
# Adding Edit Menu and its sub menus
edit = Menu(self.menubar, tearoff=0)
self.menubar.add_cascade(label='Open', menu=edit)
edit.add_command(label='Open Image',command=self.Open_Image)
sketch = Menu(self.menubar, tearoff=0)
self.menubar.add_cascade(label='Sketch', menu=sketch)
sketch.add_command(label='Create Sketch', command=self.CreateSketch)
save = Menu(self.menubar, tearoff=0)
self.menubar.add_cascade(label='Save', menu=save)
save.add_command(label='Save Image', command=self.Save_Image)
# Exit the Application
exit = Menu(self.menubar, tearoff=0)
self.menubar.add_cascade(label='Exit', menu=exit)
exit.add_command(label='Exit', command=self.Exit)
# Configuring the menubar
self.window.config(menu=self.menubar)
# ===================End=======================
# Creating a Frame
self.frame = Frame(self.window,
width=self.width,height=self.height)
self.frame.pack()
self.frame.place(anchor='center', relx=0.5, rely=0.5)
# The Scale widget to select the intensity of the
# sketch quality
self.intensity = Scale(self.window, from_=5, to=155, resolution=2, orient=HORIZONTAL, length= 300)
self.intensity.set(37)
self.intensity.place(x=320, y=520)
# Open an Image through filedialog
def Open_Image(self):
self.Clear_Screen()
self.Image_Path = filedialog.askopenfilename(title = "Select an Image", filetypes = (("Image files", "*.jpg *.jpeg *.png"),))
if len(self.Image_Path) != 0:
self.Show_Image(self.Image_Path)
# Display the Image
def Show_Image(self, Img):
# opening the image
image = Image.open(Img)
# resize the image, so that it fits to the screen
resized_image = image.resize((self.width, self.height))
# Create an object of tkinter ImageTk
self.img = ImageTk.PhotoImage(resized_image)
# A Label Widget for displaying the Image
label = Label(self.frame, image=self.img)
label.pack()
def CreateSketch(self):
# storing the image path to a variable
self.ImgPath = self.Image_Path
# If any image is not selected
if len(self.ImgPath) == 0:
pass
else:
Img = cv2.imread(self.ImgPath)
Img = cv2.resize(Img, (740,480))
GrayImg = cv2.cvtColor(src=Img, code=cv2.COLOR_BGR2GRAY)
InvertImg = cv2.bitwise_not(GrayImg)
SmoothImg = cv2.medianBlur(src=InvertImg, ksize=self.intensity.get())
IvtSmoothImg = cv2.bitwise_not(SmoothImg)
self.SketchImg = cv2.divide(GrayImg, IvtSmoothImg, scale=250)
cv2.imshow("Result Image", self.SketchImg)
# Press any key to exit
cv2.waitKey()
cv2.destroyAllWindows()
def Save_Image(self):
if len(self.SketchImg) == 0:
pass
else:
# Get the file name to be saved after making the sketch
filename = pyautogui.prompt("Enter the filename to be saved")
# Filename with the extension(extension of the original image)
filename = filename + pathlib.Path(self.ImgPath).suffix
# Saving the resulting file(self.SketchImg)
cv2.imwrite(filename, self.SketchImg)
# Remove all widgets from the frame
def Clear_Screen(self):
for widget in self.frame.winfo_children():
widget.destroy()
def Exit(self):
self.window.destroy()
if __name__ == "__main__":
root = Tk()
obj = SketchImage(root)
root.mainloop()
import cv2
import pathlib
import pyautogui
from tkinter import *
from PIL import ImageTk, Image
from tkinter import filedialog
class SketchImage:
def __init__(self, root):
self.window = root
self.window.geometry("940x580")
self.window.title('Sketch Creator')
self.window.resizable(width = False, height = False)
self.width = 700
self.height = 440
self.Image_Path = ''
self.SketchImg = ''
# ==============================================
# ================Menubar Section===============
# ==============================================
# Creating Menubar
self.menubar = Menu(self.window)
# Adding Edit Menu and its sub menus
edit = Menu(self.menubar, tearoff=0)
self.menubar.add_cascade(label='Open', menu=edit)
edit.add_command(label='Open Image',command=self.Open_Image)
sketch = Menu(self.menubar, tearoff=0)
self.menubar.add_cascade(label='Sketch', menu=sketch)
sketch.add_command(label='Create Sketch', command=self.CreateSketch)
save = Menu(self.menubar, tearoff=0)
self.menubar.add_cascade(label='Save', menu=save)
save.add_command(label='Save Image', command=self.Save_Image)
# Exit the Application
exit = Menu(self.menubar, tearoff=0)
self.menubar.add_cascade(label='Exit', menu=exit)
exit.add_command(label='Exit', command=self.Exit)
# Configuring the menubar
self.window.config(menu=self.menubar)
# ===================End=======================
# Creating a Frame
self.frame = Frame(self.window,
width=self.width,height=self.height)
self.frame.pack()
self.frame.place(anchor='center', relx=0.5, rely=0.5)
# The Scale widget to select the intensity of the
# sketch quality
self.intensity = Scale(self.window, from_=5, to=155, resolution=2, orient=HORIZONTAL, length= 300)
self.intensity.set(37)
self.intensity.place(x=320, y=520)
# Open an Image through filedialog
def Open_Image(self):
self.Clear_Screen()
self.Image_Path = filedialog.askopenfilename(title = "Select an Image", filetypes = (("Image files", "*.jpg *.jpeg *.png"),))
if len(self.Image_Path) != 0:
self.Show_Image(self.Image_Path)
# Display the Image
def Show_Image(self, Img):
# opening the image
image = Image.open(Img)
# resize the image, so that it fits to the screen
resized_image = image.resize((self.width, self.height))
# Create an object of tkinter ImageTk
self.img = ImageTk.PhotoImage(resized_image)
# A Label Widget for displaying the Image
label = Label(self.frame, image=self.img)
label.pack()
def CreateSketch(self):
# storing the image path to a variable
self.ImgPath = self.Image_Path
# If any image is not selected
if len(self.ImgPath) == 0:
pass
else:
Img = cv2.imread(self.ImgPath)
Img = cv2.resize(Img, (740,480))
GrayImg = cv2.cvtColor(src=Img, code=cv2.COLOR_BGR2GRAY)
InvertImg = cv2.bitwise_not(GrayImg)
SmoothImg = cv2.medianBlur(src=InvertImg, ksize=self.intensity.get())
IvtSmoothImg = cv2.bitwise_not(SmoothImg)
self.SketchImg = cv2.divide(GrayImg, IvtSmoothImg, scale=250)
cv2.imshow("Result Image", self.SketchImg)
# Press any key to exit
cv2.waitKey()
cv2.destroyAllWindows()
def Save_Image(self):
if len(self.SketchImg) == 0:
pass
else:
# Get the file name to be saved after making the sketch
filename = pyautogui.prompt("Enter the filename to be saved")
# Filename with the extension(extension of the original image)
filename = filename + pathlib.Path(self.ImgPath).suffix
# Saving the resulting file(self.SketchImg)
cv2.imwrite(filename, self.SketchImg)
# Remove all widgets from the frame
def Clear_Screen(self):
for widget in self.frame.winfo_children():
widget.destroy()
def Exit(self):
self.window.destroy()
if __name__ == "__main__":
root = Tk()
obj = SketchImage(root)
root.mainloop()Output

Summary
In this tutorial, we explore the creation of an Image to Pencil Sketch Converter using Python and the OpenCV library.
This tutorial is divided into two parts, the first part focuses on the core program, breaking down each step, from importing the OpenCV module to transforming an image into a pencil sketch. The process includes image loading, resizing, grayscale conversion, inverting, smoothing, and stylization.
That’s not all. In the second part, we enhance the program by adding a graphical user interface (GUI) using the Tkinter library. It creates an application for image-to-pencil sketch conversion.
Try this application to sketchify yourself and share your feedback! If you have any queries, let me know in the comments – I’m here to chat!
Ready to explore more Python Projects? Visit our separate page packed with unique ideas. Here are a few examples to spark your interest:
- Create a Meditation App in Python with Tkinter
- Create a Language Translator App in Python using Tkinter
- Create a Typing Speed Tester in Python with Tkinter
- Create an Alarm Clock using Python with Tkinter
Happy Sketching!