![]()
Introduction
In today’s world of social media and photography, applying filters to images has become a popular trend. Whether it’s enhancing the beauty of a face or adding fun elements, filters are everywhere. In this tutorial, we will create a face filter in Python that specifically focuses on changing the color of lips in an image. This project utilizes popular libraries like OpenCV and dlib for face detection and manipulation.
By the end of this article, you will have a working Python script that allows you to change the lip color in images. The main task of this project is lips color changing in images using a face filter.
What is Image Filter and How It Works
An image filter is a process of modifying or enhancing the appearance of an image. It can involve changing colors, adding effects, or even applying transformations to specific parts of an image. In this project, we are creating a face filter that specifically changes the color of the lips in an image.
The working principle involves detecting the facial landmarks (in this case, the lips) and applying a new color to the selected region. We will use dlib for detecting facial landmarks and OpenCV for manipulating the image. The color change is applied to the lips while blending it naturally with the rest of the face.
Requirements and Installation
To get started with this project, you’ll need to install the following Python libraries:
- OpenCV: This library helps in handling image processing tasks (Documentation).
- dlib: This is used for detecting facial landmarks.
Here’s how to install them:
pip install opencv-python dlib
You also need to download the “shape_predictor_68_face_landmarks.dat” file from the dlib repository, which is required for detecting facial landmarks. Download it from here.
The Source Code
Now, let’s break down the code into parts for better understanding.
Importing Libraries and Setting Up the Environment
import cv2
import numpy as np
import dlib

# Initialize the face detector and facial landmark predictor using dlib
face_detector = dlib.get_frontal_face_detector()
landmark_predictor = dlib.shape_predictor("shape_predictor_68_face_landmarks.dat")

# Function for trackbars, currently a placeholder
def empty_function(x):
    pass
In this section, we import the necessary libraries and set up the face detector and landmark predictor. We also define an empty function that will be used to create trackbars to control the lip color.
Creating Trackbars for Adjusting Lip Color
# Create a window and trackbars to adjust the RGB values for lip color
cv2.namedWindow("Lip Color Adjuster")
cv2.createTrackbar("Blue", "Lip Color Adjuster", 0, 255, empty_function)
cv2.createTrackbar("Green", "Lip Color Adjuster", 0, 255, empty_function)
cv2.createTrackbar("Red", "Lip Color Adjuster", 0, 255, empty_function)
Here, we create a window with three trackbars that allow users to adjust the blue, green, and red (BGR) color values, which will be used to change the lip color in the image.
Defining a Function to Extract the Lip Region
# Function to extract the region of interest (lips in this case)
def extract_region(image, points, resize_factor=8, mask_area=False, crop_area=True):
    if mask_area:
        # Create a mask for the selected region (e.g., lips)
        mask = np.zeros_like(image)
        mask = cv2.fillPoly(mask, [points], (255, 255, 255))
        image = cv2.bitwise_and(image, mask)
    if crop_area:
        # Crop the region of interest (e.g., the lips area)
        x, y, w, h = cv2.boundingRect(points)
        cropped_image = image[y:y+h, x:x+w]
        cropped_image = cv2.resize(cropped_image, (0, 0), None, resize_factor, resize_factor)
        return cropped_image
    else:
        return mask
This function helps to isolate the lip region from the detected face. It creates a mask for the lips and crops the region if necessary.
Applying the Lip Color and Blending It with the Original Image
# Main loop to apply lip color filter on the image
while True:
    # Load the image and resize it for easier processing
    image = cv2.imread('2.jpg')
    image = cv2.resize(image, (0, 0), None, 0.5, 0.5)
    original_image = image.copy()

    # Convert the image to grayscale for face detection
    gray_image = cv2.cvtColor(image, cv2.COLOR_BGR2GRAY)
    faces = face_detector(gray_image)

    # Loop through all detected faces
    for face in faces:
        # Detect facial landmarks
        landmarks = landmark_predictor(gray_image, face)
        points = []

        # Store the landmark points in a list
        for i in range(68):
            x = landmarks.part(i).x
            y = landmarks.part(i).y
            points.append([x, y])

        points = np.array(points)

        # Extract the lip region from the facial landmarks
        lips_region = extract_region(image, points[48:61], mask_area=True, crop_area=False)

        # Prepare a blank image for coloring the lips
        lips_color = np.zeros_like(lips_region)

        # Get the RGB values from the trackbars
        blue_value = cv2.getTrackbarPos('Blue', 'Lip Color Adjuster')
        green_value = cv2.getTrackbarPos('Green', 'Lip Color Adjuster')
        red_value = cv2.getTrackbarPos('Red', 'Lip Color Adjuster')

        # Apply the selected color to the lips
        lips_color[:] = blue_value, green_value, red_value
        lips_color = cv2.bitwise_and(lips_region, lips_color)
        lips_color = cv2.GaussianBlur(lips_color, (7, 7), 10)

        # Convert the original image to grayscale and back to color (for blending)
        grayscale_original = cv2.cvtColor(original_image, cv2.COLOR_BGR2GRAY)
        grayscale_original = cv2.cvtColor(grayscale_original, cv2.COLOR_GRAY2BGR)

        # Blend the colored lips with the original image
        final_image = cv2.addWeighted(original_image, 1, lips_color, 0.4, 0)

        # Display the final output with the colored lips
        cv2.imshow('Lip Color Adjuster', final_image)

    # Exit the loop when 'q' is pressed
    if cv2.waitKey(1) & 0xFF == ord('q'):
        break
This is where the magic happens. The code detects the face, finds the lip region, and applies the selected color. The lips are colored and blended with the original image to make the result look natural.
The Output
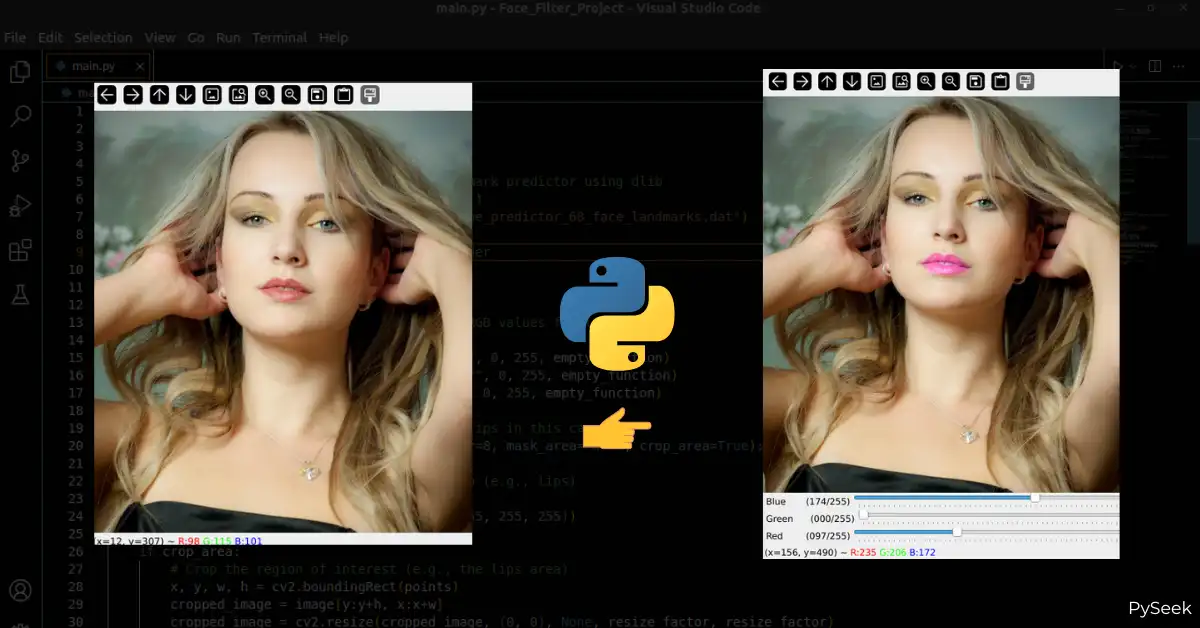
Once the program runs, you’ll see two windows: one showing the original image and another where you can adjust the lip color using the trackbars. The changes in color will be applied instantly to the lips in the image. Press ‘q‘ to exit the program.

Summary
In this article, we explored how to create a face filter in Python that changes lip color in images using OpenCV and dlib. By understanding how image filters work and setting up the right environment, we successfully implemented lip color changes in images. This tutorial is a great starting point for anyone looking to dive into Python-based image processing and face filters.
This project is not only fun but also teaches important concepts in computer vision. Experiment with different colors, try it with different images, and enhance your understanding of image processing in Python!
If you have any queries related to this project, reach out to me at contact@pyseek.com.
For more interesting topics, visit this page: Python Projects with Source Code.
Happy Editing!