![]()
Introduction
Ever feel like your fingers are tripping over the keyboard when you first start using a computer? The good news is, with practice, anyone can improve their typing speed. In fact, many jobs require strong typing skills, especially in programming. But how can you measure your typing speed and accuracy?
In this tutorial, I’ll show you how to create a Typing Speed Tester in Python using the Tkinter library. We’ll break down the source code step-by-step, so follow along closely and get ready to impress yourself with your typing progress!
Visit Also: Create an Image Compressor in Python using Tkinter
Setting Up the Environment
Please ensure that Python is installed on your system. You can download it from the Python official site (https://www.python.org/). Once settled, remember to install the following libraries using the provided commands:
- Install Pillow: pip install Pillow (Documentation)
- Install pynput: pip install pynput (Documentation)
Note that, by-default Tkinter comes with most Python installations, so you likely won’t need to install it separately. However, if you don’t have it, you can install it using pip:
- Install Tkinter: pip install tk (for managing the User Interface)
Let’s organize our project!
- Create a new folder named “Typing-Tester” to store your project files.
- Inside “Typing-Tester”, create another folder named “Images”.
- Download the image file “resultImage.jpg” and place it inside the “Images” folder.
The Project Overview
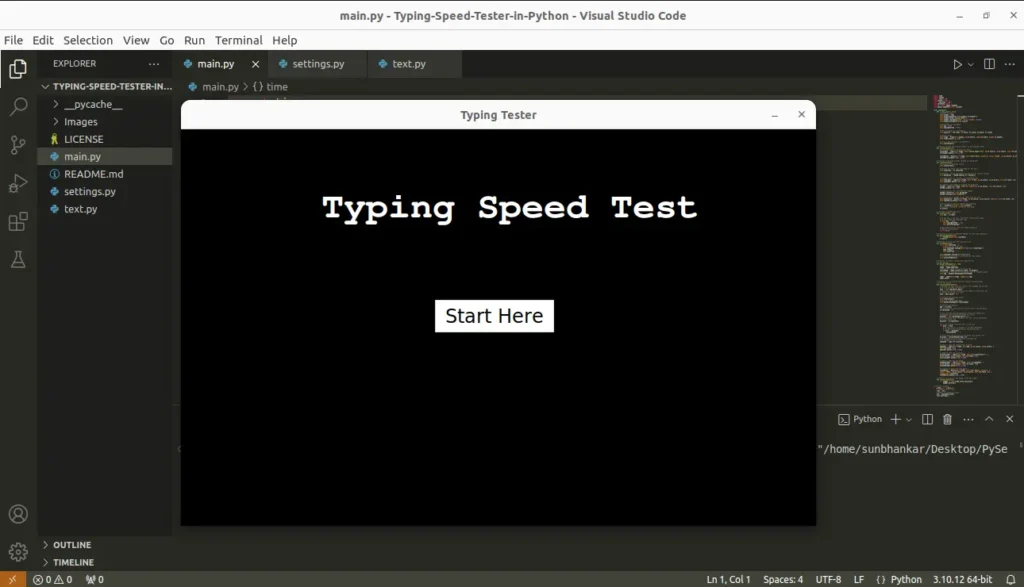
This project offers a fun and engaging way to assess your typing speed and accuracy. It starts with a welcoming window that displays the title and a “Start Here” button. Clicking this button will lead you to the test interface, where you’ll encounter a randomly selected paragraph alongside an entry box for typing.
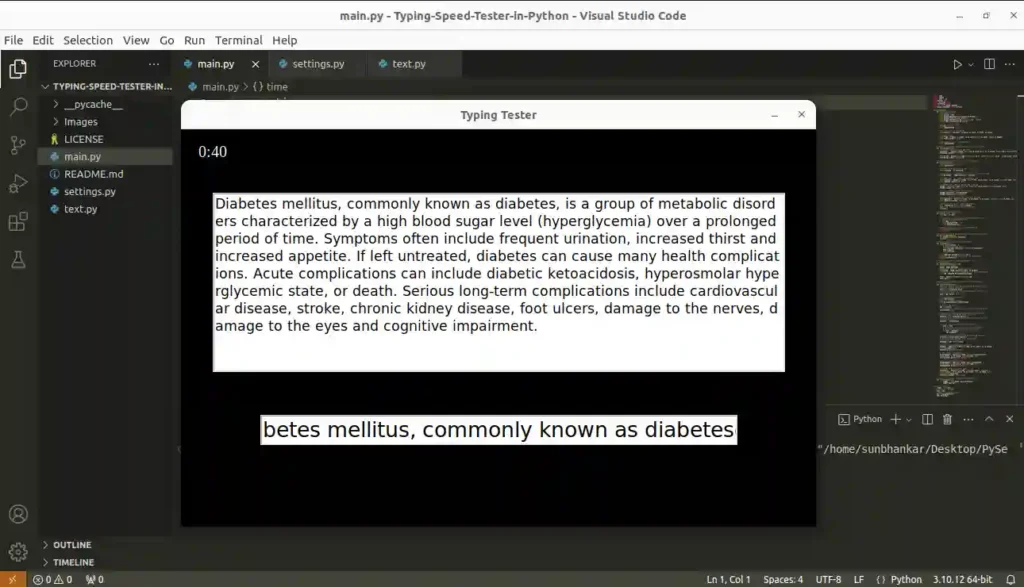
As you start typing, a one-minute countdown timer will begin. Your goal is to type the paragraph as accurately as possible within that minute. The more precise you are, the higher your typing accuracy score will be.
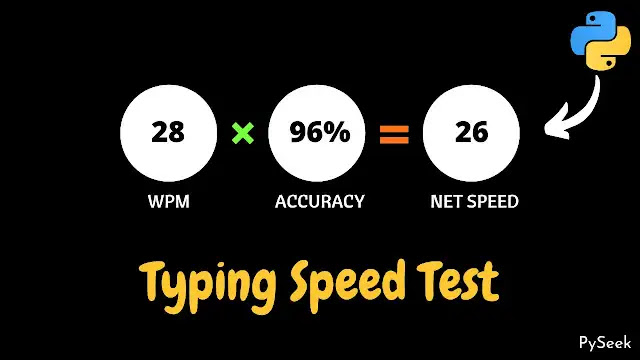
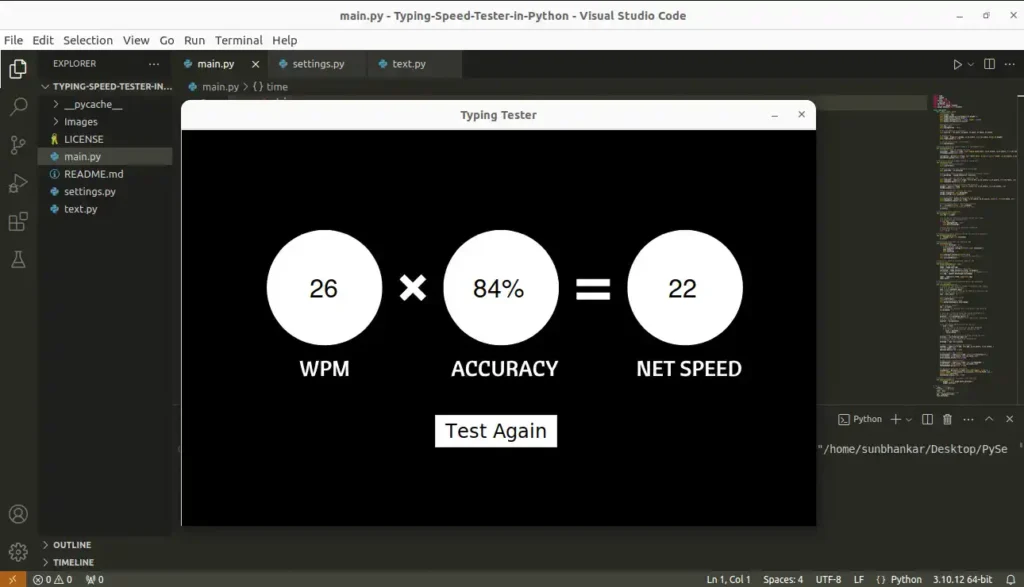
Once the timer strikes zero, a new window will pop up. It will show your typing stats. This includes your words per minute (wpm), accuracy percentage, and even your net speed (Net Speed = wpm * accuracy).
To make things visually appealing, the results window displays a beautiful background image (make sure you have the file “resultImage.jpg” in the ‘Images’ folder under the main project directory).
main.py
Let’s Create the main Python file named ‘main.py‘ inside the main project directory (“Typing-Tester”) and start implementing the program step-by-step.
Import Necessary Modules
import time
import random
import text as tt
from tkinter import *
import settings as st
from threading import *
from PIL import Image, ImageTk
from pynput.keyboard import Listener
Define the Typing Test Class
Create a class and give it the name TypingTest.
class TypingTest:
Create the Main Application Window
The __init__ method will create the main application window for us. Here, we specify the window size, title, resizable option, variables for tracking typing events, a Python list of text paragraphs for the test, etc.
    def __init__(self, root):
        # Window Settings
        self.window = root
        self.window.geometry(f"{st.width}x{st.height}")
        self.window.title('Typing Tester')
        self.window.resizable(width = False, height = False)
        self.window.configure(bg=st.color2)

        # Declaring some variables
        self.key = None
        self.typingStarted = False

        # Text for using as a paragraph
        self.textList = [tt.text1, tt.text2, tt.text3, tt.text4, tt.text5]

        # Tkinter Frame
        self.frame = Frame(self.window, bg=st.color2, width=st.width, height=st.height)
        self.frame.place(x=0, y=0)

        # Calling the function, startWindow()
        self.startWindow()
The Welcome Window
Let’s define a method called startWindow to display a welcome text “Typing Speed Text” and a button “Start Here”.
    def startWindow(self):
        # A Tkinter Label to display the title
        titleLabel = Label(self.frame, text="Typing Speed Test", bg=st.color2, fg=st.color1 ,font=(st.font3, 35, "bold"))
        titleLabel.place(x=175, y=80)

        startButton = Button(self.frame, text="Start Here", border=0, cursor='hand2' ,fg=st.color2, bg=st.color1, font=(st.font4, 18), command=self.startTest)
        startButton.place(x=320, y=215)
Typing Test Window
Now let’s define another method called startTest. This method will display the time label, a text widget to display the paragraph, and the Tkinter entry widget where the user can type.
    def startTest(self):
        # Clearing the previous screen
        self.clearScreen()

        # Getting the total time allocated for the test
        self.totalTime = st.totalTime

        # Choosing a random paragraph from the list of several choices
        self.paragraph = random.choice(self.textList)

        # A Label widget for showing the remainning time
        self.timeLabel = Label(self.frame, text="1:00", bg=st.color2, fg=st.color1, font=(st.font1, 15))
        self.timeLabel.place(x=20, y=15)

        # A Tkinter Text widget to display the paragraph
        textBox = Text(self.frame, width=65, height=10, bg=st.color1, font=(st.color2, 13))
        textBox.place(x=40, y=80)

        # Inserting the text into the Text widget
        textBox.insert(END, self.paragraph)
        textBox.config(state='disabled')

        # A Tkinter Entry widget to get input from the user
        self.inputEntry = Entry(self.frame, fg=st.color2, bg=st.color1, width=35, font=(st.font4, 20))
        self.inputEntry.place(x=100, y=360)

        # Define the on press to capture key pressing
        ls =  Listener(on_press = self.listener)
        # Starting a different thread for this task
        ls.start()
Detect Key Press
Now declare a method called listener to detect any key presses. When a key is pressed, this method will call another method called multiThreading to create a separate thread for performing a specific task.
    def listener(self, key):
        self.key = str(key)

        # If any key is pressed, a different thread will create
        # to Count Down the remaining time.
        if self.key != None:
            self.typingStarted = True
            self.multiThreading()

        # Returning False to stop the thread created to
        # capture key pressing.
        return False
Multi-Threading
To keep the graphical interface running smoothly, this multiThreading method creates a separate ‘worker’ ( or thread) to handle the time countdown. This way, the main program can focus on managing the interface without worrying about the timer ticking in the background. We’ve chosen the countDown method to be this dedicated worker.
    def multiThreading(self):
        x = Thread(target=self.countDown)
        x.start()
Display the Remaining Time
Next up, we’ll create a method called countDown This method is like a timer for our program. It will keep track of the remaining time during the test and update the window to show it. Once the timer hits zero, countDown will hand things over to another method named calculateResult.
    def countDown(self):
        while self.totalTime > 0:
            # Updating the Time Label
            self.timeLabel.config(text=f"{0}:{self.totalTime}")
            time.sleep(1)
            self.totalTime -= 1

        self.timeLabel.config(text=f"{0}:{0}")
        # Calling the Function to Calculate the Final Result
        self.calculateResult()
Set an Image
To display your typing stats – words per minute (WPM), accuracy, and net speed – I’ve created a visually striking image (“resultImage.jpg“). This image serves as the background for the results window. You might not realize it at first, but the image plays a big role in making the results window so engaging.
Let’s declare a method named backgroundImage to display the image.
    def backgroundImage(self, img):
        # Opening the image
        image = Image.open(img)
        # Resize the image to fit to the screen
        resizedImg = image.resize((st.width, st.height))
        # Creating an instance of PhotoImage class of ImageTk module
        self.img = ImageTk.PhotoImage(resizedImg)

        label = Label(self.frame, image=self.img)
        label.pack()
Calculate the Result
Once the timer’s up, we’ll switch gears to the calculateResult method. This function takes your typing performance and calculates the final results, including your WPM, accuracy, and net speed. These results will then be displayed on the screen for you to see. And if you’re ready to jump back in, there’ll be a button (“Test Again“) to let you restart the test.
    def calculateResult(self):
        # Getting the text from the Tkinter Entry Widget and storing
        # it to a variable called text.
        text = self.inputEntry.get()
        # Splitting the text by chosing the SPACE as a delimiter and
        # storing the words in a list.
        text = text.split(" ")

        # Clearing the previous screen
        self.clearScreen()
        # Setting a Background image
        self.backgroundImage(st.resultImage)

        # wpm(word per minute)
        wpm = len(text)
        # A variable for counting the correct answer from the given
        correctAnswer = 0

        # splliting the main paragraph by chosing the SPACE as a
        # delimiter and storing the words in a list.
        mainText = self.paragraph.split(" ")
        # Excluding the word redundancy from the list by converting
        # it to a python set.
        mainText = set(mainText)

        # Iterate through the given text by the user
        for word in text:
            # If the word is is present in the Main Paragraph
            # increment the correctAnswer variable by one.
            if word in mainText:
                correctAnswer += 1

        # Calculating the accuracy of the given text by the user
        accuracy = (correctAnswer/wpm)*100
        # Calculating the net speed after applying the
        # percentage of the accuracy
        netSpeed = (wpm/100)*accuracy

        # Label to show the wpm(word per minute)
        wpmLabel = Label(self.frame, text=wpm, bg=st.color1, fg=st.color2, \
        font=(st.font2, 24))
        wpmLabel.place(x=160, y=186)

        # Label to show the accuracy
        accuracyLabel = Label(self.frame, text=f"{int(accuracy)}%", \
        bg=st.color1, fg=st.color2, font=(st.font2, 24))
        accuracyLabel.place(x=366, y=186)

        # Label to show the net speed
        netSpeedLabel = Label(self.frame, text=int(netSpeed), \
        bg=st.color1, fg=st.color2, font=(st.font2, 24))
        netSpeedLabel.place(x=612, y=186)

        # A Button to start the test again
        resetButton = Button(self.frame, text="Test Again", border=0, \
        cursor='hand2' ,fg=st.color2, bg=st.color1, font=(st.font4, 18), \
        command=self.startTest)
        resetButton.place(x=320, y=360)
Clear the Screen
You might have noticed a method called clearScreen used multiple times in the code. This handy method does exactly what its name suggests – it clears out all the elements (widgets) from the frame we created at the program’s start (in the __init__ method). This allows us to reuse the same frame for different parts of the test.
    def clearScreen(self):
        for widget in self.frame.winfo_children():
            widget.destroy()
Initializing the Application
In the main part of your code, create an instance of the TypingTest class to build the GUI, and then start the main loop.
if __name__ == "__main__":
    # Instance of Tk class
    root = Tk()
    # Object of TypingTest class
    obj = TypingTest(root)
    root.mainloop()
In this block of code, we check if the script is being run as the main program (__name__ == “__main__”). This ensures that the code inside this block only runs when the script is executed, not when it’s imported as a module.
Settings.py
To keep things organized, create a separate Python file named ‘Settings.py‘ and paste the code provided below. This Program file stores all the configuration settings used by our main program (‘main.py‘).
I highly recommend leaving all the settings here as it is.
# Width and Height
width = 800
height = 500

# Total Time (In seconds)
totalTime = 60

# The path of the image file
resultImage = "Images/resultImage.jpg"

# Colors
color1 = "white"
color2 = "black"

# Font choices
font1 = "Times new roman"
font2 = "Helvetica"
font3 = "Courier"
font4 = "Kokila"
Text.py
In the Project Overview, we mentioned that the program picks random paragraphs from multiple options. To make this work, we’ll create a Python file called ‘text.py‘. This file will act like a library of paragraphs, where each paragraph is stored in its own variable.
This way, the program can easily choose a random paragraph for you to type during the test.
text1 = "Allergies, also known as allergic diseases, are a number of \
conditions caused by hypersensitivity of the immune system to typically \
harmless substances in the environment. These diseases include hay \
fever, food allergies, atopic dermatitis, allergic asthma, and \
anaphylaxis. Symptoms may include red eyes, an itchy rash, sneezing, \
coughing, a runny nose, shortness of breath, or swelling. Food \
intolerances and food poisoning are separate conditions."

text2 = "We usually give inputs to the computer using the keyboard. \
Well, what if there is something that can record the keystroke given \
through our keyboard? Whatever you type, a password or a username, \
it would record everything. You might be thinking it's a fantasy. \
No, it's not. A Keylogger can do all of those tasks hiddenly. There \
are two types of keylogger, Software Keylogger and Hardware Keylogger. \
Literally it tracks keystrokes and stores all the activity in a log file."

text3 = "People have benefited a lot since the invention of the computer. \
Today, we can easily manage human management work using many software \
tools. Student management as such is a tool for handling students' data. \
For example, general information(name, address, DOB, etc.), admission \
details, grading system, attendance, and others relevant to the school \
or college students."

text4 = "Kali Linux is a Debian-derived Linux distribution designed for \
digital forensics and penetration testing. It is maintained and funded \
by Offensive Security. Kali Linux has around 600 penetration-testing \
programs (tools), including Armitage (a graphical cyber attack management \
tool), Nmap (a port scanner), Wireshark (a packet analyzer), metasploit \
(penetration testing framework), John the Ripper (a password cracker), \
sqlmap (automatic SQL injection and database takeover tool), Aircrack-ng \
(a software suite for penetration-testing wireless LANs), etc."

text5 = "Diabetes mellitus, commonly known as diabetes, is a group of \
metabolic disorders characterized by a high blood sugar level \
(hyperglycemia) over a prolonged period of time. Symptoms often include \
frequent urination, increased thirst and increased appetite. If left \
untreated, diabetes can cause many health complications. Acute \
complications can include diabetic ketoacidosis, hyperosmolar \
hyperglycemic state, or death. Serious long-term complications include \
cardiovascular disease, stroke, chronic kidney disease, foot ulcers, \
damage to the nerves, damage to the eyes and cognitive impairment."
Output
Make sure to watch the entire video to understand how our Typing Tester Application works:
Summary
In this tutorial, we’ve built a fun and practical project using Python. It’s a Typing Speed Tester. We used the Tkinter library to create a user-friendly interface for this application.
The whole project is organized into three Python files: ‘main.py’, ‘settings.py’, and ‘text.py’. During the test, our Typing Tester chooses random paragraphs from several pre-stored options and allocates sixty (60) seconds. You have to type it as accurately as possible.
Your performance will be measured in three ways: words per minute (wpm), accuracy percentage, and net speed (Net Speed = wpm * net speed).
For any queries or feedback, please leave your comment below. I’m always happy to hear from you.
Want more lovely Tkinter Projects like this? Visit our separate page packed with various Python Projects. Below are a few examples to spark your interest:
- Create a Drawing Application using Python Tkinter
- Create Your Own Personal Diary with Python
- Create a Meditation App in Python with Tkinter
- Create an Alarm Clock using Python with Tkinter
Happy Typing!