Introduction
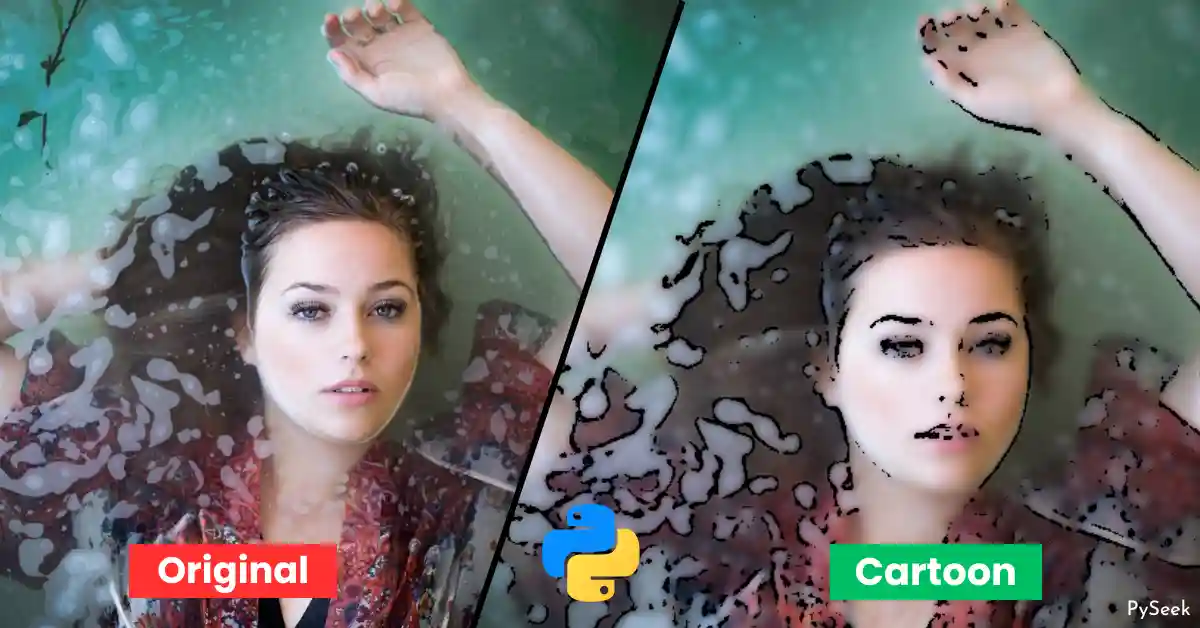
Have you ever tried converting your own photo into a cartoon? By the way, it’s not a joke. Many people love turning their images into cartoons and share on social media. Even I’ve personally tried this technique multiple times with my pictures. There are many online tools to achieve this task. But what if we make our own Image to cartoon converter? Sounds great right?
In this tutorial, we are gonna create such an Image to Cartoon Converter using Python language with the help of OpenCV and Tkinter libraries. But, before we move to the main Project discussion, we have to understand the core logic behind the Cartoonify process and how it’s achieved through Python programming.
So, I divided the whole topic into two parts. In the first part, you’ll learn how to give an image cartoon effect step-by-step through a Python program. In the second part, we’ll apply the same logic to create a Python application that will help to achieve the Cartoonify effect in just a few clicks. It would be so easy to use that application by anyone.
So, let’s move on to our great discussion.
Requirements
First, we need to install the OpenCV library (Documentation). To get it, please use the following command:
pip install opencv-python
Don’t worry about Tkinter Library (Documentation). It comes pre-installed with most Python installations. In case if you don’t have it, you can install it using the following command:
pip install tk
Understanding the Program
Let’s break down the concept of image to a cartoon conversion using a Python program, step by step.
Importing the module
I recommended you create a separate folder named “Cartoon-Maker” for this project and declare a Python file within it as “cartoon_maker.py“.
Now, let’s start by importing the cv2 module.
import cv2
Opening an Image
Let’s open your gallery and pick a good-quality photo of yourself. Now keep it in the project folder.
Mention the name of the image in a variable called ‘img_path‘ and load the image using cv2.imread function.
img_path = "woman.jpg"
img = cv2.imread(img_path)
Resizing and Displaying the Image
Not all computer or laptop users have the same screen sizes, which means the displayed image may not appear perfectly for everyone.
To ensure uniformity and avoid any inconsistencies, it’s important to adjust the image’s size so that it appears the same for all users. You can achieve this by utilizing the cv2.imread function.
img = cv2.resize(img, (820,540))
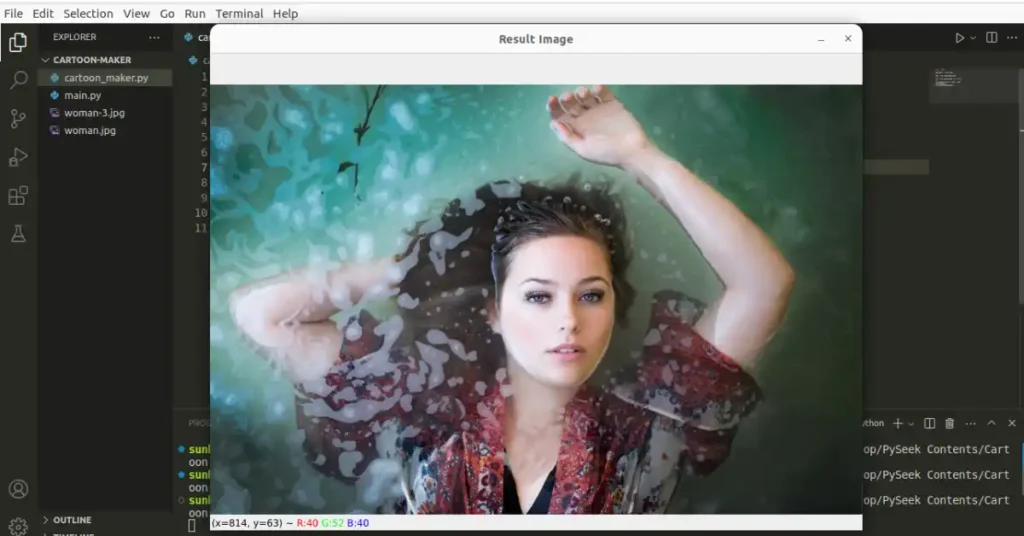
Before we move to the editing phase, let’s display the original image using the cv2.imshow function.
cv2.imshow("Result Image", img)
cv2.waitKey()
cv2.destroyAllWindows()
Output
Converting to Grayscale
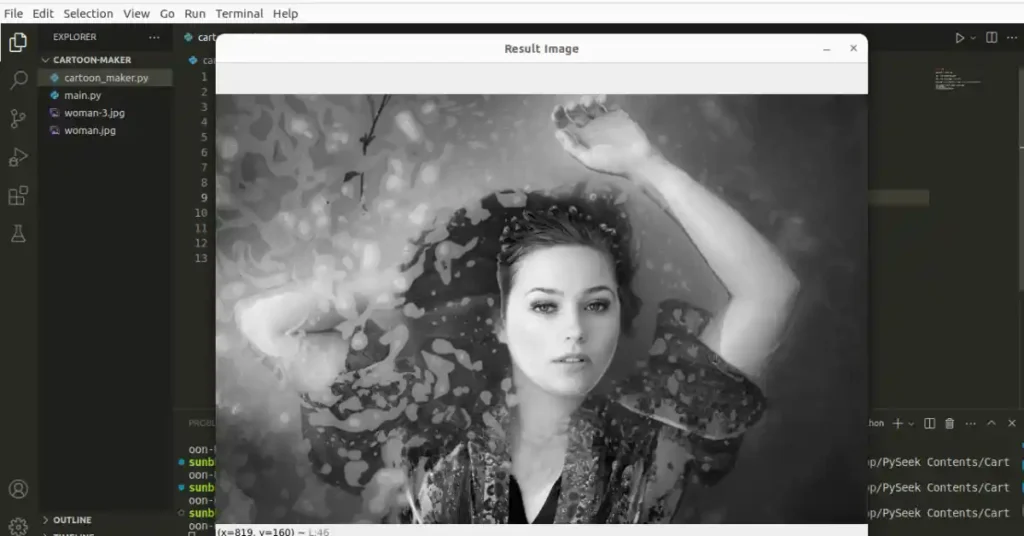
We’ll first convert the image to grayscale to create a cartoon effect. To do so, we will use the cv2.cvtColor function. Within this function, we need to specify the initial loaded image as the initial parameter, followed by the code value, which expects an integer input.
gray_img = cv2.cvtColor(src=img, code=cv2.COLOR_BGR2GRAY)
There are so many code options, each associated with a distinct integer. Remembering these numerical values can prove challenging, which is why we opt to use the more memorable code name (like cv2.COLOR_BGR2GRAY in this example) rather than dealing with the numeric representation.
Here is the documentation for the conversion of color spaces: OpenCV Documentation.
Now, to display the transformed grayscale image, we’ll use the same code block utilized for display in the previous section. The only adjustment needed is updating the second parameter within the cv2.imshow function, specifying it as ‘gray_img‘.
cv2.imshow("Result Image", gray_img)
cv2.waitKey()
cv2.destroyAllWindows()
Output
Smoothing the Image
Smoothing an image is a crucial step in the process of image-to-cartoon conversion.
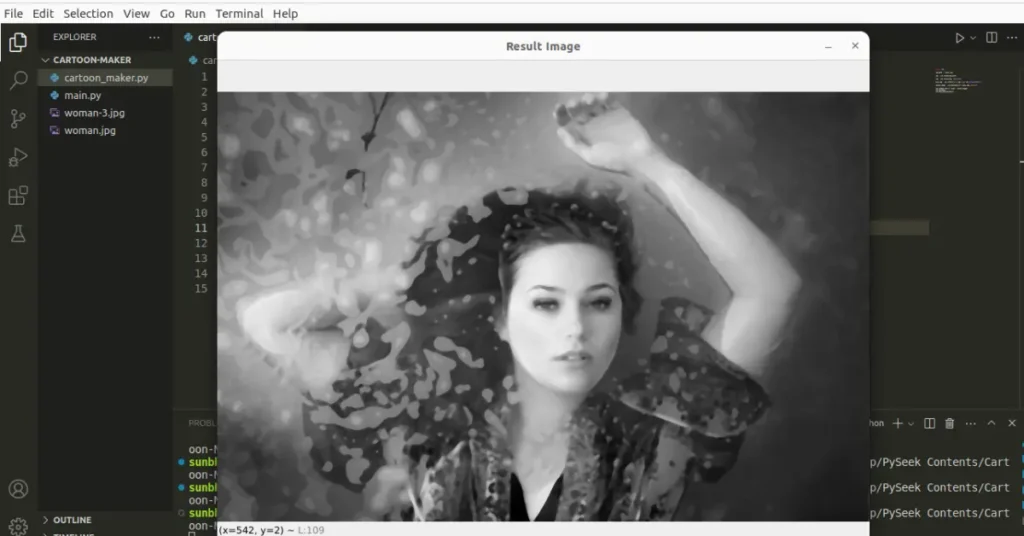
Smoothing is the art of blurring an image while preserving its essential features. It helps simplify the image’s details, reducing noise and preparing it for the cartoonization process.
In this step, we will apply median blur to our grayscale image to achieve our present goal.
smooth_image = cv2.medianBlur(src=gray_img, ksize=5)
In the code above,
- ‘src‘ represents the image (“gray_img”) that we previously converted into a grayscale image.
- The ‘ksize‘ denotes the size of the kernel used for blurring. In our case, we’ve taken the value of ‘5’. Note that, it only takes odd integer values. You can adjust this value to control the level of smoothing, keeping in mind that higher values give stronger smoothing effects.
Again, we’ll display the smoothed image using the same technique as the previous section.
cv2.imshow("Result Image", smooth_img)
cv2.waitKey()
cv2.destroyAllWindows()
Output
Applying Edge Detection
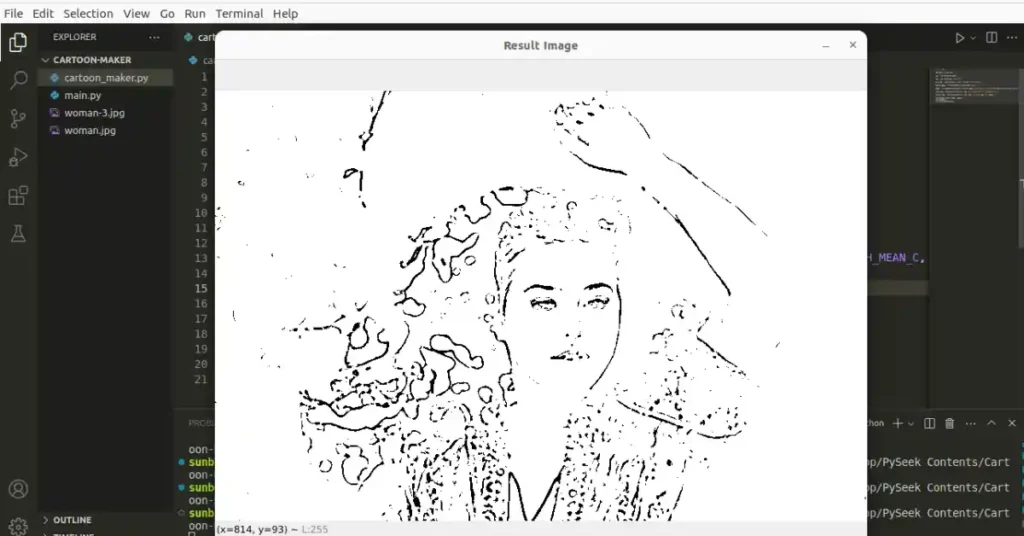
Now we will apply the edge detection technique to the previously filtered image.
Edge detection is a fundamental process that enhances the contours of objects in an image, giving it that distinctive cartoon-like appearance. Here, we’ll achieve this using the adaptive thresholding technique. To do so, we will use the cv2.adaptiveThreshold function in our code.
edges = cv2.adaptiveThreshold(src=smooth_image, maxValue=255, adaptiveMethod=cv2.ADAPTIVE_THRESH_MEAN_C, thresholdType=cv2.THRESH_BINARY, blockSize=7, C=6)
In the code above,
- ‘src‘ is the smoothed image (“smooth_image”) that we prepared earlier in our process.
- ‘maxValue‘ stands for the highest possible pixel value, which, in our context, is set at ‘255’ and is assigned to pixels that satisfy the threshold conditions.
- ‘adaptiveMethod‘ (
cv2.ADAPTIVE_THRESH_MEAN_C) specifies the adaptive thresholding method, which calculates the threshold for each neighborhood as the mean of the neighborhood area. - ‘thresholdType‘ (
cv2.THRESH_BINARY) indicates that pixel values exceeding the threshold will be set to the maximum value (255), while those below the threshold will be set to zero.
Now, let’s show the recently added filtered image.
cv2.imshow("Result Image", edges)
cv2.waitKey()
cv2.destroyAllWindows()
Output
Applying Cartoon Effect
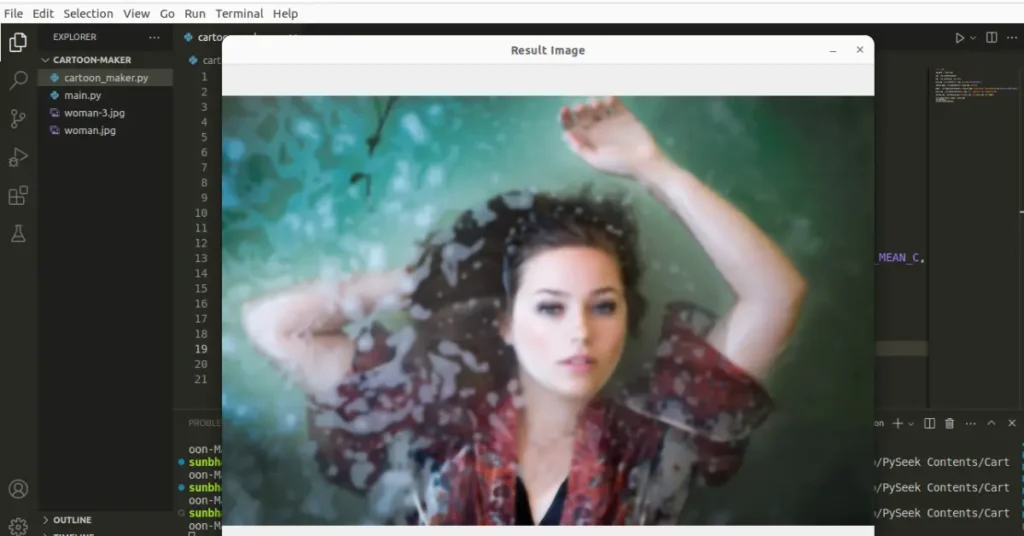
In this section, we will give the image cartoon effect using bilateral filtering. It is a key tool in image processing, as it simultaneously smooths an image while preserving important details such as edges.
Let’s do the code:
color_img = cv2.bilateralFilter(src=img, d=9, sigmaColor=300, sigmaSpace=300)
In the code above,
- ‘img‘ is the original version of your image.
- The parameter ‘d‘ stands for the diameter of each pixel neighborhood considered during filtering.
- ‘sigmaColor‘ controls the filter’s influence based on the color. To get a cartoonish effect, you need to choose the value > 150 for it.
- ‘sigmaSpace‘ controls the filter’s influence based on the spatial distances or coordinates. To get fine-tune the artistic effect choose the higher values for the last two parameters.
What would it look like? Let’s display it again.
cv2.imshow("Result Image", color_img)
cv2.waitKey()
cv2.destroyAllWindows()
Output
Applying Stylization
We are at the last step of this cartoonization process. In this section, we’ll employ the bitwise AND function to apply stylization to our cartoonized image.
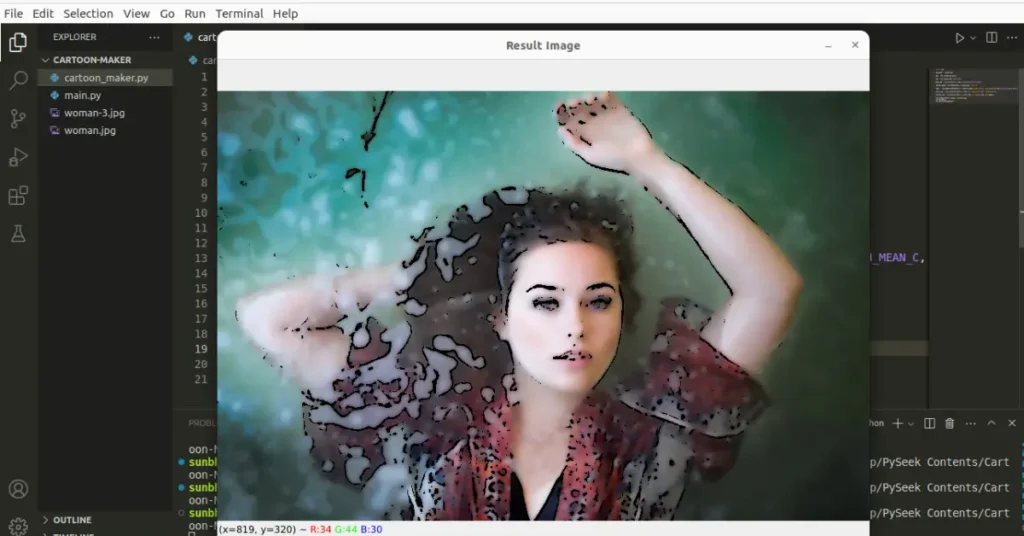
This function allows us to combine the cartoonized image with an edge-detected image, highlighting the contours and features of the image, just like a hand-drawn illustration.
Here’s how to apply the bitwise AND function in Python:
cartoon_img = cv2.bitwise_and(src1=color_img, src2=color_img, mask=edges)
In the code above:
- `color_image` is the image that we’ve cartoonized using previous techniques.
- `edges` is the edge-detected image we prepared earlier in the process using adaptive thresholding.
Our cartoon image is ready now. Let’s display it.
cv2.imshow("Result Image", cartoon_img)
cv2.waitKey()
cv2.destroyAllWindows()
Output
Save the Image
We have transformed our original image into a cartoon image, but to utilize it elsewhere, we have to save it. Add this code snippet at the end of the program to save the cartoonized image in the current working directory.
cv2.imwrite("result.jpg", cartoon_img)
Make the Program an Application
Now it’s time to improve the user experience of our program by giving a touch of Graphical Interface using the Tkinter library. We’re gonna create an application for converting an image into a cartoon using Python.
The core logic of the program will be the same. In this case, we will create a GUI window and some widgets to select, display, cartoonize, and save the image.
So, Before you copy the entire code, create a Python file as ‘app.py‘ within the “Cartoon-Maker” folder.
import cv2
import pathlib
import pyautogui
from tkinter import *
from PIL import ImageTk, Image
from tkinter import filedialog

class Image_Cartoonify:
    def __init__(self, root):
        self.window = root
        self.window.geometry("960x560")
        self.window.title('Cartoonify')
        self.window.resizable(width = False, height = False)

        self.width = 740
        self.height = 480

        self.Image_Path = ''

        # ==============================================
        # ================Menubar Section===============
        # ==============================================
        # Creating Menubar
        self.menubar = Menu(self.window)

        # Adding Edit Menu and its sub menus
        edit = Menu(self.menubar, tearoff=0)
        self.menubar.add_cascade(label='Open', menu=edit)
        edit.add_command(label='Open Image',command=self.open_image)

        # Menu widget to cartoonify the image
        cartoonify = Menu(self.menubar, tearoff=0)
        self.menubar.add_cascade(label='Cartoonify', menu=cartoonify)
        cartoonify.add_command(label='Create Cartoon', command=self.cartoonify)

        # Exit the Application
        exit = Menu(self.menubar, tearoff=0)
        self.menubar.add_cascade(label='Exit', menu=exit)
        exit.add_command(label='Exit', command=self._exit)

        # Configuring the menubar
        self.window.config(menu=self.menubar)
        # ===================End=======================

        # Creating a Frame
        self.frame = Frame(self.window,
        width=self.width,height=self.height)
        self.frame.pack()
        self.frame.place(anchor='center', relx=0.5, rely=0.5)

    # Open an Image through filedialog
    def open_image(self):
        self.clear_screen()
        self.Image_Path = filedialog.askopenfilename(title = "Select an Image", filetypes = (("Image files", "*.jpg *.jpeg *.png"),))
        if len(self.Image_Path) != 0:
            self.show_image(self.Image_Path)

    # Display the Image
    def show_image(self, Img):
        # Opening the image
        image = Image.open(Img)
        # resize the image, so that it fits to the screen
        resized_image = image.resize((self.width, self.height))

        # Create an object of tkinter ImageTk
        self.img = ImageTk.PhotoImage(resized_image)

        # A Label Widget for displaying the Image
        label = Label(self.frame, image=self.img)
        label.pack()

    def cartoonify(self):
        # Storing the image path to a variable
        ImgPath = self.Image_Path

        # If any image is not selected
        if len(ImgPath) == 0:
            pass
        else:
            # Get the file name to be saved after cartoonify the image
            filename = pyautogui.prompt("Enter the filename to be saved")
            # Filename with the extension (extension of the original image)
            filename = filename + pathlib.Path(ImgPath).suffix
            # Read the image
            Img = cv2.imread(ImgPath)
            Img = cv2.resize(Img, (740,480))
            GrayImg = cv2.cvtColor(src=Img, code=cv2.COLOR_BGR2GRAY)
            SmoothImg = cv2.medianBlur(src=GrayImg, ksize=5)

            Edges = cv2.adaptiveThreshold(src=SmoothImg, maxValue=255, adaptiveMethod=cv2.ADAPTIVE_THRESH_MEAN_C, thresholdType=cv2.THRESH_BINARY, blockSize=9, C=9)

            # Adjust the the values of sigmaColor and sigmaSpace to get a proper cartoon effect
            ColorImg = cv2.bilateralFilter(src=Img, d=9, sigmaColor=300, sigmaSpace=300)

            CartoonImg = cv2.bitwise_and(src1=ColorImg,src2=ColorImg,mask=Edges)

            cv2.imwrite(filename, CartoonImg)

            self.clear_screen()
            self.show_image(filename)

    # Remove all widgets from the frame
    def clear_screen(self):
        for widget in self.frame.winfo_children():
            widget.destroy()

    # It destroys the main GUI window of the
    # application
    def _exit(self):
        self.window.destroy()

if __name__ == "__main__":
    root = Tk()
    # Creating an object of Image_Cartoonify class
    obj = Image_Cartoonify(root)
    root.mainloop()
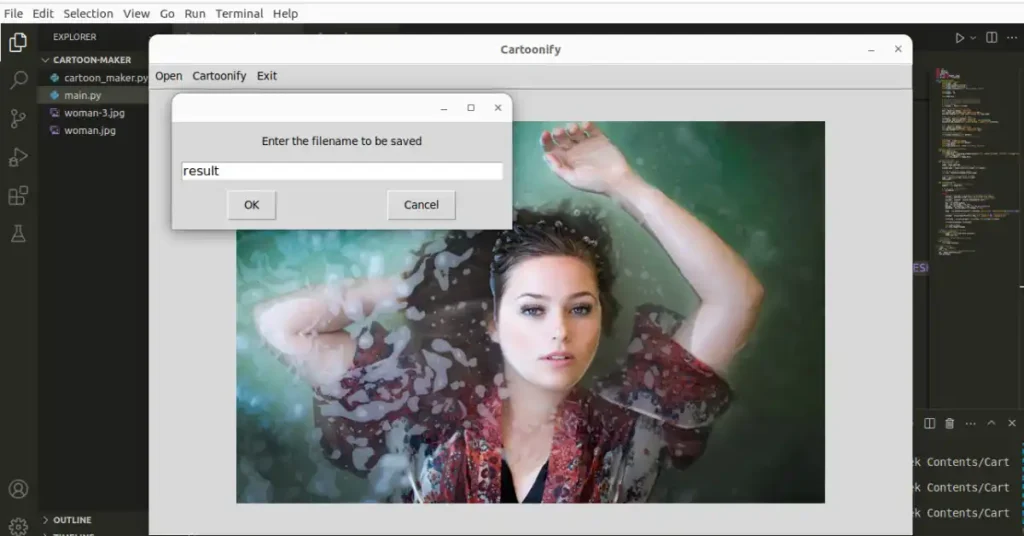
In the above program, we create a class named Image_Cartoonify and declare six methods. The __init__ creates a GUI window and all the widgets. The open_image method opens a tkinter dialog box to choose the image.
The show_image method displays the selected image on the frame. The cartoonify method is responsible for giving the selected image a cartoon effect. The clear_screen and _exit methods help to remove all the widgets showing on the window and close the window respectively.
Output
Summary
In this tutorial, we explore the creation of an Image to Cartoon Converter using Python and the OpenCV library.
This tutorial is divided into two parts, the first part focuses on the core program, breaking down each step, from importing the OpenCV module to transforming an image into a cartoon. The process includes image loading, resizing, grayscale conversion, smoothing, edge detection, applying a cartoon effect, and stylization.
That’s not all. In the second part, we enhance the program by adding a graphical user interface (GUI) using the Tkinter library. It creates an application for image-to-cartoon conversion.
Try this application to cartoonify yourself and share your thoughts on how it dazzles! If you’ve got any burning questions about this topic, don’t hesitate to connect with me – I’m here to chat!
Ready to explore more Python Projects? Visit our separate page packed with unique ideas. Here are a few examples to spark your interest:
- Create an Image Compressor in Python using Tkinter
- Create a Meditation App in Python with Tkinter
- Create a Multiple Files Renamer in Python with Tkinter
- Build a Face Recognition Login System using Python
Happy Coding!


