![]()
Introduction
In our digital world, images are more important than ever. From capturing special moments to sharing news and creating art, they’re all around us. They help us keep our memories safe, share information, and express ourselves through art. And if you’re a Python developer, you might one day need to build an image viewer app to help people see and interact with these images. Tkinter, a popular Python GUI library, can help you easily create such an application.
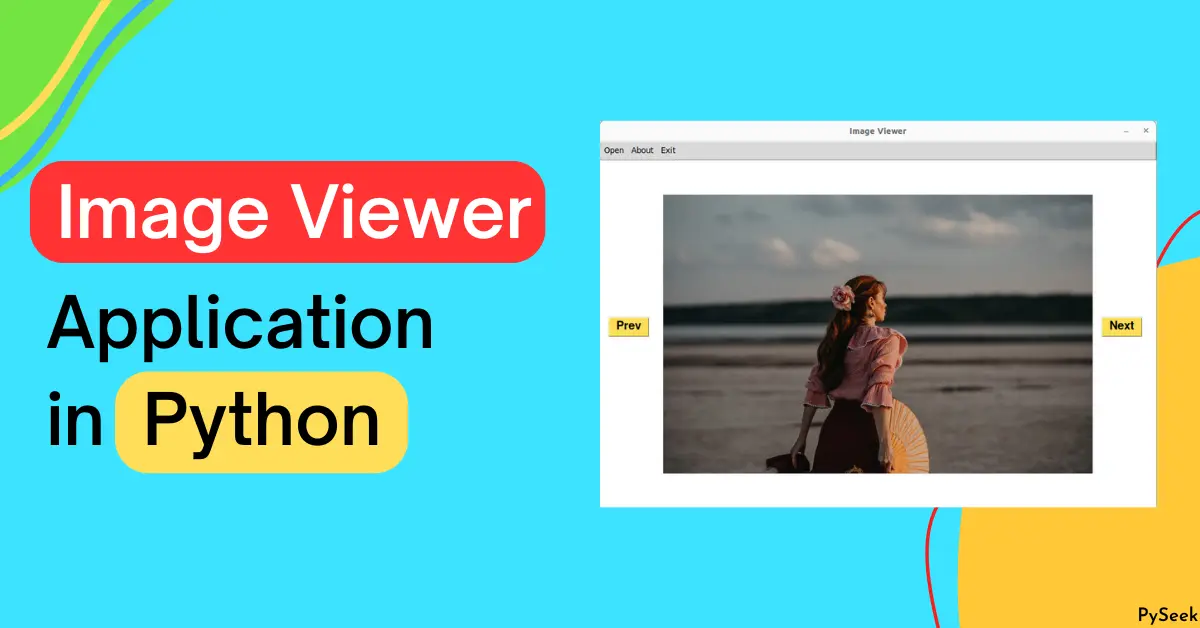
This tutorial is here to help! Here, I will guide you to create an image viewer application in Python using the Tkinter library. By the end, you’ll have a working image viewer that lets users open, view, and navigate through their pictures with ease.
Features of the Image Viewer Application
The application provides the following features:
- You can choose one or multiple images to display.
- It’s possible to select an entire directory that contains a variety of images with different file extensions.
- When you reach the end of the displayed images, it will automatically loop back to the first image for the next one. Similarly, when you reach the first image, it will start with the last image for the previous one.
Requirements
Before we dive into the code, ensure that you have Python installed on your system. Get the latest version from their website (https://www.python.org/). You will also need to install Tkinter (Documentation) and Pillow libraries.
Tkinter is included with most Python installations, so you likely won’t need to install it separately (For the Pillow library, you need to perform an additional installation). However, if you don’t have it, you can install it using pip:
pip install tk
pip install Pillow
Setting Up the Project
Let’s start by creating a project directory for our image viewer application. You can name it whatever you like. Inside this directory, create a Python script (e.g., ‘image_viewer.py‘) where we’ll write our code.
Importing the Necessary Libraries
Open your ‘image_viewer.py‘ file and begin by importing the required libraries:
import glob
from tkinter import *
from PIL import ImageTk, Image
from tkinter import filedialog, messagebox
Defining the Image Viewer Class
Create a class and give it the name Image_Viewer.
class Image_Viewer:
Creating the Main Application Window
Now, let’s create the various GUI components that our image viewer will consist of. The __init__ method will create the main application window for us. Here, we declare some variables and specify the window size, title, background color, resizable option, menu bar, etc.
    def __init__(self, root):
        self.window = root
        self.window.geometry("960x600")
        self.window.title('Image Viewer')
        self.window.configure(bg='white')
        self.window.resizable(width = False, height = False)

        # Declare some variables that initially store None value
        self.img = img
        self.Image_Path = image_path

        self.Image_List = list()
        self.cur_index = 0

        self.width = 740
        self.height = 480

        # ==============================================
        # ================Menubar Section===============
        # ==============================================
        # Creating Menubar
        self.menubar = Menu(self.window)
        # Adding Edit Menu and its sub menus
        edit = Menu(self.menubar, tearoff=0)
        self.menubar.add_cascade(label='Open', menu=edit)
        edit.add_command(label='Open Image',command=self.open_image)
        edit.add_command(label='Open Images',command=self.open_images)
        edit.add_command(label='Open Folder',command=self.open_directory)

        # Adding About Menu
        about = Menu(self.menubar, tearoff=0)
        self.menubar.add_cascade(label='About', menu=about)
        about.add_command(label='About', command=self.about_window)

        # Exit the Application
        exit = Menu(self.menubar, tearoff=0)
        self.menubar.add_cascade(label='Exit', menu=exit)
        exit.add_command(label='Exit', command=self.Exit)

        # Configuring the menubar
        self.window.config(menu=self.menubar)
        # ===================End=======================

        # Buttons
        prev_btn = Button(self.window, text="Prev", font=("Helvetica", 15, 'bold'), bg= '#FFDE59', command=self.prev_image)
        prev_btn.place(x=15,y=270)

        next_btn = Button(self.window, text="Next", font=("Helvetica", 15, 'bold'), bg='#FFDE59', command=self.next_image)
        next_btn.place(x=865,y=270)

        # Creating a Frame (#38B6FF)
        self.frame = Frame(self.window, bg='white',width=self.width,height=self.height)
        self.frame.pack()
        self.frame.place(anchor='center', relx=0.5, rely=0.5)
Creating Methods for Image Navigation
Now, let’s implement the methods open_image, open_images, open_directory, prev_image, and next_image that will handle image navigation and opening:
    # Open an Image
    def open_image(self):
        self.reset()

        self.Image_Path = filedialog.askopenfilename(title = "Select an Image", filetypes = (("Image files", "*.jpg *.jpeg *.png"),))
        if len(self.Image_Path) != 0:
            self.Image_List.append(self.Image_Path)
            # Show the first image
            self.display_image(0)

    # Open Multiple Images
    def open_images(self):
        self.reset()

        self.Image_Path = filedialog.askopenfilenames(initialdir = "/", title = "Select Images", filetypes = (("Image files", "*.jpg *.jpeg *.png"),))
        if len(self.Image_Path) != 0:
            for path in self.Image_Path:
                self.Image_List.append(path)
            # Show the fisrt image
            self.display_image(0)

    # Open a directory
    def open_directory(self):
        self.reset()

        self.directory = filedialog.askdirectory()
        if self.directory != '':
            image_extensions = ['jpg', 'jpeg', 'png']
            for ext in image_extensions:
                for filename in glob.iglob(self.directory + f'**/*.{ext}', recursive=True):
                    self.Image_List.append(filename)

            self.display_image(0)

    # It displays the previous image
    def prev_image(self):
        if self.cur_index > 0 and self.cur_index < len(self.Image_List):
            self.cur_index -= 1
            self.clear_screen()
            self.display_image(self.cur_index)
        # The image will display from the end
        else:
            self.cur_index = len(self.Image_List) - 1
            self.clear_screen()
            self.display_image(self.cur_index)

    # It displays the next image
    def next_image(self):
        if self.cur_index < len(self.Image_List) - 1:
            self.cur_index += 1
            self.clear_screen()
            self.display_image(self.cur_index)
        # The image will display from the start again
        else:
            self.cur_index = 0
            self.clear_screen()
            self.display_image(self.cur_index)
Here’s the summary of the above code:
open_image: This method calls theresetmethod and opens a file dialog that allows the user to select an image file. It then appends the selected image path to the ‘Image_List‘ and finally, calls thedisplay_imagemethod to show the selected image.open_images: This method does the same task as the one before, but it allows the user to select multiple image files.open_directory: It allows the user to choose a directory, similar to the previously described methods.prev_image: This method compares the current index of the displaying image with the length of the ‘Image_List‘ list. Depending on the outcome, it decreases the ‘cur_index‘ by 1, updates the window, and displays the previous image if there is one (otherwise, it begins with the last image).next_image: In the same way, this method also compares the current index of the displaying image with the length of the `Image_List` list. Depending on the outcome, it increases the `cur_index` by 1, updates the window, and displays the next image if there is one (otherwise, it begins with the first image).
Displaying Images
Now, let’s define the display_image method to display images in the application:
    def display_image(self, index):
        image = Image.open(self.Image_List[index])
        resized_image = image.resize((self.width, self.height))

        # Create an object of tkinter ImageTk
        self.img = ImageTk.PhotoImage(resized_image)

        # Create a Label Widget to display the text or Image
        label = Label(self.frame, image=self.img)
        label.pack()
Declaring Miscellaneous Methods
Now, let’s declare a method called clear_screen, which is used multiple times within the program to clear the application window. Add one more method called reset to call the clear_screen method, emptying the ‘Image_List‘ list, and resetting the ‘cur_index‘ to zero (0).
Additionally, we’ll create two more methods, about and Exit, to establish connections with the ‘About’ and ‘Exit’ buttons in the menu bar.
    # Remove all widgets from the frame
    def clear_screen(self):
        for widget in self.frame.winfo_children():
            widget.destroy()

    def reset(self):
        self.clear_screen()
        self.Image_List.clear()
        self.cur_index = 0

    # About window
    def about_window(self):
        messagebox.showinfo("Image Viewer", "Image Viewer 22.05;\nDeveloped by Subhankar Rakshit")

    # It destroys the main GUI window of the application
    def Exit(self):
        self.window.destroy()
Initializing the Application
We’ve defined all the necessary methods and created the GUI components. Let’s add a few lines at the end of your script to initialize the application. In this main part of your code, create an instance of the Image_Viewer class to build the GUI, and then start the main loop.
if __name__ == "__main__":
    root = Tk()
    # Creating these objects for avoiding image vanishing(Garbage Collector)
    img = None
    image_path = None
    # Creating a Image_Rotator class object
    obj = Image_Viewer(root)
    root.mainloop()
In this block of code, we check if the script is being run as the main program (__name__ == “__main__”). This ensures that the code inside this block only runs when the script is executed, not when it’s imported as a module.
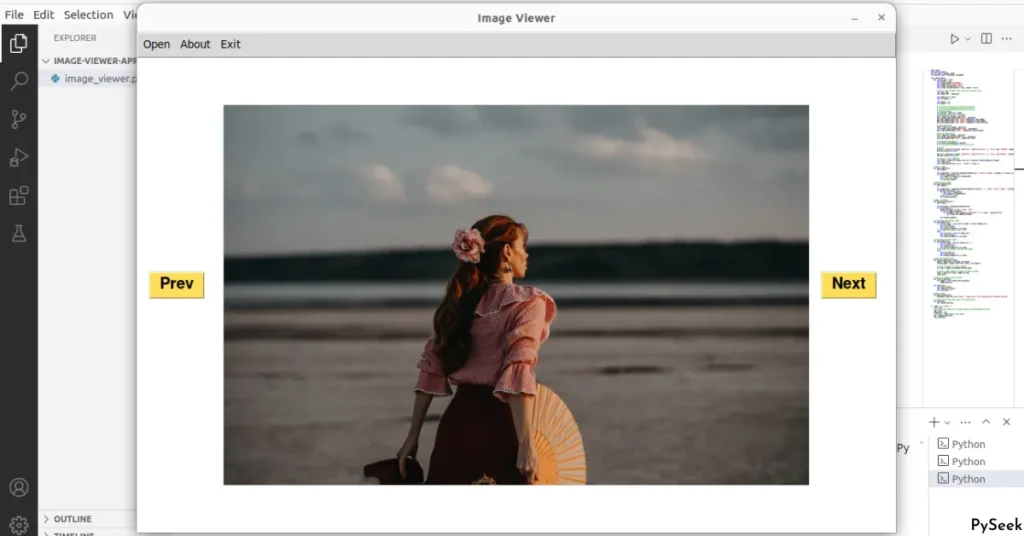
Output
Summary
In this tutorial, we developed an Image Viewer Application in Python using the Tkinter library. This application offers the following features:
- Opening an Image.
- Opening Multiple Images.
- Selecting a directory to show all the images present there.
- Navigate through the images using the ‘Next’ and ‘Prev’ buttons.
If you’re looking to get started building graphical applications, this is a fantastic way to dip your toes in. Tkinter is a great toolkit that comes with Python, and it allows you to create desktop apps. With some practice, you’ll be able to build even more complex programs with all sorts of features!
For more Python projects like this one, visit our separate page packed with unique ideas. Here are a few examples to spark your interest:
- Create a Typing Speed Tester in Python with Tkinter
- Create a Meditation App in Python with Tkinter
- Create a Multiple Files Renamer in Python with Tkinter
- Create an Image to Pencil Sketch Converter in Python
If you have any queries or feedback, leave them in the comments. I would love to hear from you.