Introduction
In the world of digital manipulation, image rotation is a fundamental operation that finds its application in various fields such as photography, graphics design, computer vision, and more. With the power of Python programming, image rotation becomes a simple task that can be accomplished using a few lines of code. In this article, we will explore how to rotate an image using Python and the popular image processing libraries: OpenCV and Pillow.
Understanding Image Rotation
Image rotation involves changing the orientation of an image by a certain angle around its center point. This transformation is widely used to correct the alignment of images, create artistic effects, and manipulate visual content. The most common rotation angles are 90, 180, and 270 degrees, representing clockwise and anti-clockwise rotations.
Requirements
Before we dive into the coding process, make sure you have the OpenCV and Pillow library installed on your system. If not, you can install those using the following command:
Install OpenCV: pip install opencv-python
Install Pillow: pip install Pillow
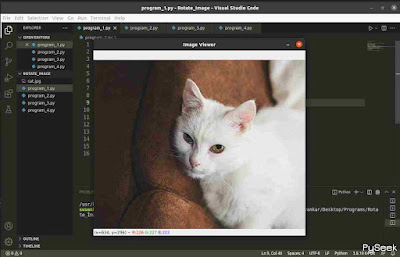
The Original Image
`cat.jpg`
Rotate an image using OpenCV
You can perform the rotation operation on any image using OpenCV library, which provides the following rotation choices:
- Clockwise rotation by 90 degrees.
- Counter-clockwise rotation by 90 degrees (or 270 degrees counter-clockwise).
- Clockwise rotation by 180 degrees.
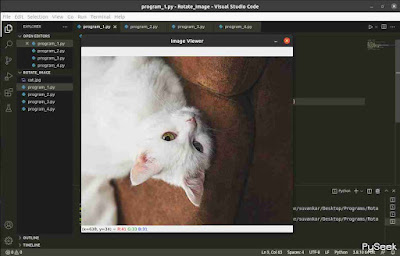
Clockwise rotation by 90 degrees
 # Importing the cv2 module
import cv2

# Image path: The image is in the current directory
img = 'cat.jpg'
# Reading the image data
data = cv2.imread(img)
# Rotating the image 90 degree clock-wise
rot_img = cv2.rotate(data, cv2.cv2.ROTATE_90_CLOCKWISE)
# Showing the rotated image(without saving)
cv2.imshow("Image Viewer", rot_img)
# Press any key to exit the "Image Viewer Window"
cv2.waitKey(0)
Output
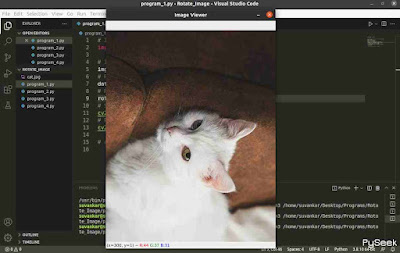
Counter-clockwise rotation by 90 degrees (or 270 degrees counter-clockwise)
# Importing the cv2 module
import cv2

# Image path: The image is in the current directory
img = 'cat.jpg'
# Reading the image data
data = cv2.imread(img)
# Rotating the image 90 degree clock-wise
rot_img = cv2.rotate(data, cv2.cv2.ROTATE_90_COUNTERCLOCKWISE)
# Showing the rotated image(without saving)
cv2.imshow("Image Viewer", rot_img)
# Press any key to exit the "Image Viewer Window"
cv2.waitKey(0)
Output
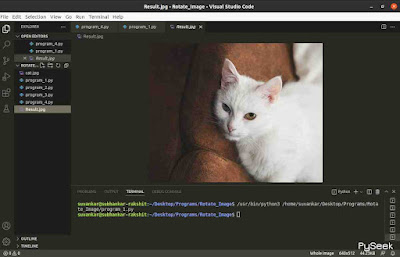
Clockwise rotation by 180 degrees
In this scenario, we have to mention only “ROTATE_180”, it will rotate the image clockwise by default.
# Importing cv2 module
import cv2

# Image path: The image is in the current directory
img = 'cat.jpg'
# Reading the image data
data = cv2.imread(img)
# Rotating the image 90 degree clock-wise
rot_img = cv2.rotate(data, cv2.cv2.ROTATE_180)
# Showing the rotated image(without saving)
cv2.imshow("Image Viewer", rot_img)
# Press any key to exit the "Image Viewer Window"
cv2.waitKey(0)
Output
Save the result image
You can store the rotated or resulting image using the `cv2.imwrite` function. By default, it saves the file in the present working directory. If you prefer a different location, you’ll need to modify the current working directory to your desired destination.
# Importing the cv2 module
import cv2

# Image path: The image is in the current directory
img = 'cat.jpg'
# Reading the image data
data = cv2.imread(img)
# Rotating the image 90 degree clock-wise
rot_img = cv2.rotate(data, cv2.cv2.ROTATE_180)
# Saving the rotated image
# Argument 1: The filename, Argument 2: Result Image
cv2.imwrite("Result.jpg", rot_img)
# Showing the rotated image(without saving)
cv2.imshow("Image Viewer", rot_img)
# Press any key to exit the "Image Viewer Window"
cv2.waitKey(0)
Output
Rotate an image using Pillow
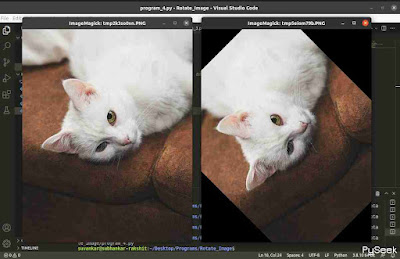
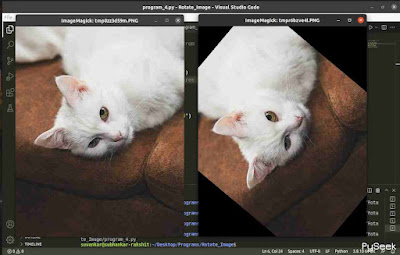
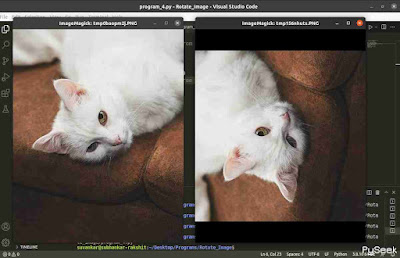
You can perform image rotation to any angle with the pillow module, which is better in this respect than the OpenCV library. However, it is worth noting that the Pillow library supports counterclockwise rotation exclusively.
45 degree rotation (anti-clockwise)
# Import the Image module from PIL
from PIL import Image

# Open the original image
img  = Image.open("cat.jpg")
# Rotating the image 45 degree anti-clockwise
rotated = img.rotate(45)
# Show the original image
img.show(title="Original")
# Show the rotated image
rotated.show(title="Rotated")
Output
50 degree rotation (anti-clockwise)
# Import the Image module from PIL
from PIL import Image

# Open the original image
img  = Image.open("cat.jpg")
# Rotating the image 50 degree anti-clockwise
rotated = img.rotate(50)
# Show the original image
img.show()
# Show the rotated image
rotated.show()
Output
90 degree rotation (anti-clockwise)
# Import the Image module from PIL
from PIL import Image

# Open the original image
img  = Image.open("cat.jpg")
# Rotating the image 90 degree anti-clockwise
rotated = img.rotate(90)
# Show the original image
img.show()
# Show the rotated image
rotated.show()
Output
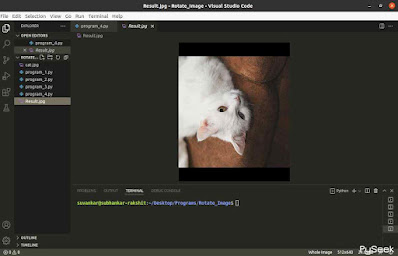
Save the rotated image
The Pillow library provides the flexibility to save an image in your preferred location using the `Image.save()` method. By default, it stores the file in the current working directory, but you have the option to change this location to your desired destination by adjusting the current working directory.
# Import the Image module from PIL
from PIL import Image

# Open the original image
img  = Image.open("cat.jpg")
# Rotating the image 90 degree anti-clockwise
rotated = img.rotate(90)
# Saving the rotated image
rotated.save("Result.jpg")
# Show the rotated image
rotated.show()
Output
Conclusion
Image rotation is a fundamental operation in image processing that can be effortlessly achieved using Python with OpenCV and Pillow libraries. With just a few lines of code, you can rotate images by any desired angle, correct alignment issues, and add creative twists to your visual content. Whether you’re a photographer, graphic designer, or computer vision enthusiast, mastering image rotation opens up a world of possibilities for your projects. So, go ahead and experiment with rotating images using Python, and unlock the potential of digital manipulation at your fingertips.


